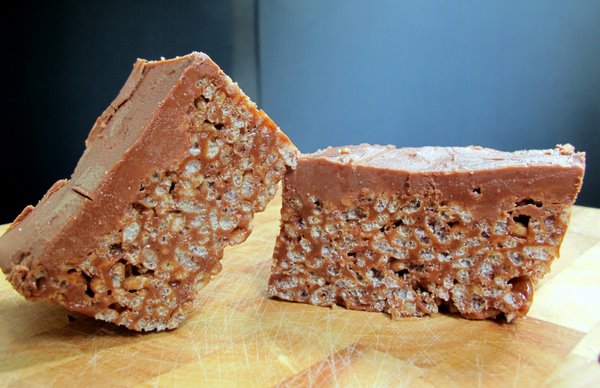
You know, I’d like to just open this post by saying that mars bar slice kicks chocolate crackles’ arse. If there was ever a fight to the death (a fight of deliciousness, that is) between treats containing rice bubbles, there would be no contest. Maybe it has something to do with copha, that gritty vegetable shortening that holds a chocolate crackle together (ew). Or maybe it’s the contrast between chewy/crunchy/salty/sweet that mars bar slice has. And if melting down a a shitload of mars bars and butter doesn’t seem decadent enough, maybe it’s that extra layer of chocolate on top that really seals the deal.
Whatever the reason, mars bar slice is the eternal crowd pleaser. Unless your’e diabetic. Or lactose intolerant. or don’t like chocolate. OK well, let’s just say we’re in a crowd of sweet tooths with no discernable allergies.
Mars Bar Slice from Exclusively Food
120g butter
270g Mars Bars
1 1/2 tablespoons (30ml) golden syrup
3 3/4 cups (120g) rice bubbles
For the topping:
225g milk chocolate
20g butter
Boiling water
Grease a 16cm by 21cm baking tray/pyrex dish, or anything roughly that volume.
Place butter, Mars Bars and golden syrup in a saucepan over medium heat. Stir constantly with a whisk. You will know when it’s ready as not only will the lumps of nougat melt, but the whole mixture will suddenly gel together, thicken and become smooth and homogeneous. Turn off the heat.
Add the rice bubbles to the Mars Bar mixture and gently stir to combine, trying not to crush the rice bubbles.
Melt the chocolate and butter in the microwave, stirring every so often until smooth and liquid.
Press mixture firmly into the greased pan. Spread slice with topping and refrigerate overnight.
To loosen the slice, fill your sink with boiling water and place the slice, in its tray in the sink for a couple of minutes to loosen it. Turn it out onto a chopping board and slice to the desired sized pieces, dipping a sharp knife in a cup of boiling water in between slices. the slice will be quite hard, either wait 10 minutes or cut with a sawing motion. Store in an airtight container in the refrigerator.
Tip: You could use baking paper rather than greasing the pan, this will be a hell of a lot easier as long as you have some overhang.
Want to know more about the death by chocolate blog hop? Find out more more over at The Hungry Australian.
I don’t know about you, but travel for me is mostly about food. When I eat the thing from the place in the actual place of the thing, well, that’s not a very articulate way of putting it, but in the words of Maeve O’Meara, it’s a revelation. And there’s no better way to attempt to relive your travel than to eat the thing that you ate in the place of the thing, but this time, eat it at YOUR place.
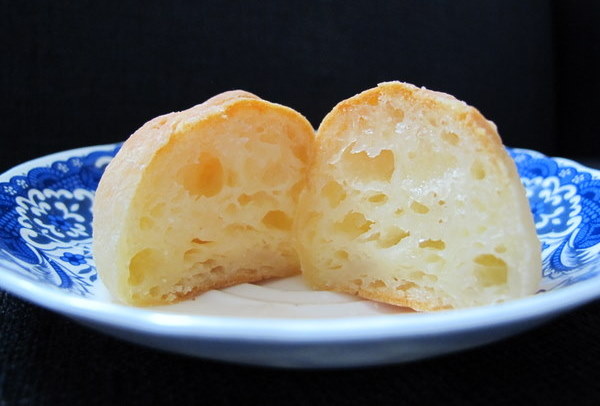
I found myself at a bit of a loose end this week, so I decided to make Pão de Queijo (Cheese Puffs), a typical Brazilian snack/breakfast food which I don’t even particularly like, but I wish I was in Brasil right now and what better way to celebrate that than to bake. The main ingredients are manioc/tapioca starch, cheese, eggs, liquid and fat.
When baked, they look a lot like profiteroles but, although the method is similar, it is a hell of a lot more difficult as the starch makes the dough sticky and you have to knead rather than just stir it. I found this virtually impossible so I would recommend using a food processor. Pão de Queijo has a wonderfully squishy texture and these puffs are yummy straight from the oven or reheated in the microwave.
A quick tip: all the recipes I’ve read say not to let the dough sit (it doesn’t need to rise or anything); either bake it immediately or form it into balls and freeze because if you let it sit, it will magically re-liquidise!
Pão de Queijo (a combination of online recipes, this one and this one were particularly helpful)
2 cups full cream milk
½ cup melted butter
450g tapioca/manioc starch (often called tapioca flour, make sure you get one that has the texture of cornflour rather than the one with the texture of polenta),
Excess tapioca/manioc starch for shaping the dough into balls (you can also use oil or water)
3 eggs
2 cups grated cheese (traditionally queijo de minas, but I used a combination of Colby and Romano, mostly Romano)
Preheat the oven to 200°c.
In a medium pan, bring the milk and butter to the boil. Remove from the heat immediately.
Either take your chances and gradually pour the manioc flour into the pan, stirring constantly or put the manioc flour in the food processor and on a slow speed gradually pour in the hot liquid.
Allow to cool; the dough should be cool enough to knead.
Next, knead the dough or turn the food processor on to a medium speed. Add the eggs, one at a time, incorporating each egg completely before the next egg is added. The dough should be smooth and elastic but still very soft and sticky. Add the cheese and knead well until completely incorporated.
You now have 3 choices – flour your hands with tapioca flour, oil them or dampen them. Then roll the dough into even, 2-3cm balls and place on a baking tray lined with baking paper or a silicone mat.
Bake for about 20 minutes, checking after ten minutes to make sure they are not over browning. They are done when they sound hollow when tapped, as they cool they will soften. Freeze or store in an airtight container, best served warm or reheated for 10 seconds in the microwave.
Makes about 30.
What foods from your travels do you love to cook?
When I was a vego, I cooked heavy on the cheese. Although I didn’t eat a lot of it by itself, it was in or on anything it could be. I remember when I was 13 or so cooking up a pot of thick tomato pasta sauce and thinking to myself ‘What if I added tonnes of cheese to this?’ It was, in the words of Maeve O’Meara, a revelation.
It was a habit I had break when I moved in with my boyfriend, who was aghast at how much cheese I put in everything. Very early on in our relationship I made him Pizzoccheri, a dish from of Grandfather’s family made of buckwheat pasta, potatos, cabbage, garlic, and lashings of melted butter, cubed fontina and grated parmesan. And when I say lashings, I really mean lashings. My biggest mistake was letting him watch me make it. Although he said it was lovely, I could see him shudder as I poured about half a cup of melted butter over the dish. Not exactly heart smart.
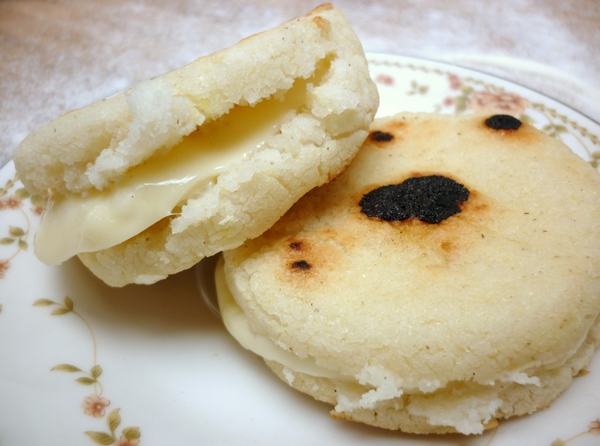
These days my main cheesy outlet is romano or parmesan on pasta – I just can’t help myself. I love how cheese can take a plain, usually carb-based dish and turn it into something special. And this is definitely the case with arepas.
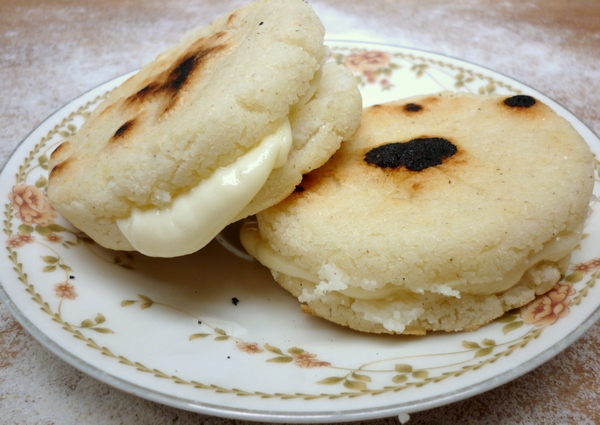
Arepas are made all over Colombia and Venezuela and often contain cheese, either mixed through the dough or stuffed in afterwards. They can also be stuffed with a variety of other fillings such as avocado, meat, black beans or fried eggs. They are commonly eaten as snacks or for breakfast but also can form part of a meal. They can be pan fried or deep fried and are both a street food and made at home as they are very easy to make and, in counties with corn as a staple, incredibly cheap. They are also mass produced, in fact, there is even a company in Brisbane that makes them, Grandma ¡Arepas!.
Arepas rellenas de queso (Arepas stuffed with cheese)
2 cups of Harina P.A.N. (pre-cooked white cornmeal)
2 ½ cups lukewarm water
1 teaspoon salt
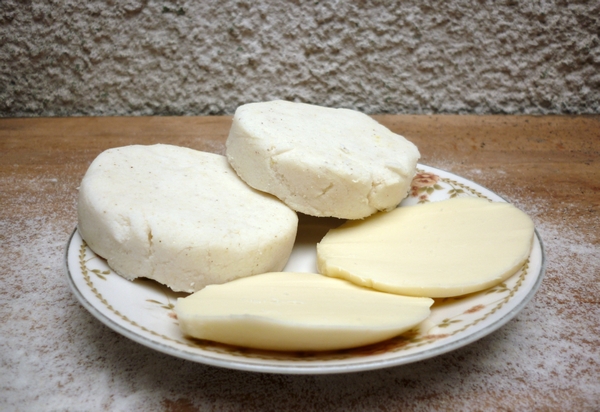
8 slices of cheese (just smaller than the palm of your hand. I used provalone because it is round and also a bit ‘stringy’)
Pour the water into a large bowl and stir in the salt. Slowly pour in the white cornmeal. I assume this is to avoid lumps, but I’ve done it in reverse order and there was no discernible difference.
Knead the dough until smooth. It will be a bit sticky, so let it sit for a few minutes if you like.
Preheat a frypan to a medium high heat. You could also use a bbq if you want to do them all at once.
Meanwhile, divide the mixture into 8 balls and shape them by hand into flat patties. They should be the same thickness all the way through, about 1-2 centimetres thick and perfectly round. An easier method is to line an egg ring (for frying eggs) with cling wrap and push the balls of dough into shape using that.
When the pan is hot enough, place the arepas in. When they start to ‘pop’ or dance, flip them. They should be browned and have a thick crust, like ‘giraffe skin’. Continue in batches until all are cooked
Allow the arepas to cool slightly, cut open and fill with cheese. You can return them to the heat briefly if you want the cheese to melt.
What’s your favourite cheesy indulgence?
About me
 Sharing easy recipes, hunting down the best coffee. Honest accounts, nothing too serious. Read more...
Recent Posts
- Aerpress means no more shit #travelcoffee and #workcoffee
- Why I write and four ace bloggers who do it better
- The five best things I ate in London
- Shoreditch is awesome, airports are not
- I quit sugar? Do I bollocks.
- Cubao Street Food, Alexandria
- The Reformatory Caffeine Lab, Surry Hills
- Brewtown Newtown
- Stay caffeinated over Christmas
- Gumption by Coffee Alchemy, Sydney CBD
Popular posts this month…
 Kosher Whole Orange Cake posted on July 5, 2011
  Review – Philips Saeco Intelia posted on January 10, 2012
  Sparkling Long Black posted on May 10, 2011
  Rich Portuguese Custard posted on November 29, 2010
  Lemonade Scones and family recipes posted on February 25, 2011
  3 linger-worthy Sydney CBD Cafés posted on July 12, 2013
  Assembly Curated Coffee & Tea, Carlton, Melbourne posted on August 27, 2013
  Salat Hatzilim posted on January 28, 2011
Disclaimer:
All opinions in this blog are mine, an everyday, real-life person. I do not accept payment for reviews and nor do I write sponsored posts. I do not endorse the content of the comments herein.


