In case you were wondering, I have decidedly unexotic and Catholic heritage- generic Irish/English stock on my Dad’s side and on my Mum’s side, half Northern Italian and half more of the same. I am, as they say, an anglo mongrel, and the food I grew up on reflects that fact. I am sometimes accused, mostly jokingly but with a dash of truth thrown in, of growing up ‘without culture’ by my partner, his heritage being a mix of Portuguese and Iraqi Jew now considered exotic.
In a way, I think as Australians we shortchange ourselves when we say we have ‘no culture’. We have every culture, that’s the point, and we can serve it all up on a plate and pretend for five minutes that we are all friends. It solves nothing, but it feeds everyone. And there are things that I think all of us who love food understand. Many of the conversations we had growing up centred on food. What did you have for lunch, what should we have for dinner, have you eaten? These are universal questions for perpetually hungry and food-obsessed families, whatever their nationality.
Food for me is mostly all about my mother. It is the same for my partner, on the phone to his mum trying to suss out exactly the right methods or ingredients to get that thing she made for him as a kid just the way she made it. If we cook something our parents used to make, and try to make it the way they would when we were kids, it is kind of ritual, a kind of homage. Whether that thing be a sausage sanger or a perfectly rendered matzo ball, we can chow down on each with equal gusto.
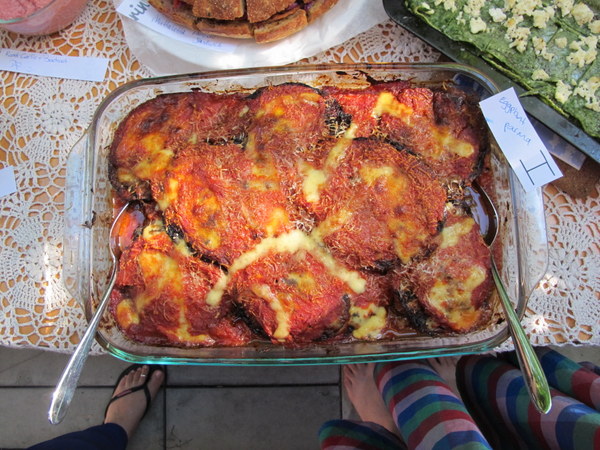
This recipe is basically eggplant parma, a combination of a traditional eggplant fritter recipe from my Grandfather’s family and the tomato sauce that we would eat in some form at least once a week when I was growing up. I would happily subsist on slow-cooked tinned tomatoes for the rest of my life, and this is one mind-numbingly delicious way of serving it.
Eggplant Parmigiana
Serves 8 generously, if served with salads and sides.
2 enormous eggplants, cut into ½ centimetre slices
1 egg, lightly beaten
1 cup flour
1 stale baguette, blended in the food processor
olive oil, for shallow frying
Extra virgin olive oil
2 small onions, finely chopped
pinch chilli flakes
pinch salt
6-8 cloves garlic, finely chopped
4x 400g tins chopped tomatos
1/2 cup red wine
2 sprigs rosemary (optional)
500g mozzarella, sliced
150g good quality parmesan or romano cheese, grated
Tip: You can either make the sauce first or take the ‘do everything at once approach’ outlined below, just keep in mind that the sauce should cook for at least an hour. The whole dish can be made a few days in advance; once everything is layered together, refrigerate and when you want to serve it, bring it up to room temperature before cooking.
Salt the eggplant slices well, layer on a plate and place a heavy object on top. Arrange three bowls on the bench, 1 with the flour, 1 with the beaten egg, and 1 with the breadcrumbs. Leave the weighted eggplant slices to sit for 20 minutes.
Heat the oil in a large pan. Cook the onions until translucent, then add the salt, chilli flakes and garlic. Cook until all ingredients are done but not brown. Add the wine to deglaze the pan, cook a couple of minutes. Add the tomatoes, give the tomato tins a bit of a rinse and pour the resulting water in too. Simmer the sauce for 45 minutes – 11/2 hours, adding in the rosemary about halfway through.
While the sauce is simmering, rinse the eggplants and pat dry. Heat the oil in a large frying pan to shallow fry the eggplant. Then it is just a matter of dipping each eggplant slice in flour, then egg, the breadcrumbs and popping them into the oil. Turn each slice over so it browns on both sides, and when done, put the slices on a plate lined with paper towel to drain well. This process takes about the same amount of time as simmering the sauce.
Remove the rosemary from the sauce, give the mixture a quick blitz with a stick blender if too lumpy, and leave to cool.
Preheat the oven to 180 degrees C. In a large baking dish, layer the sauce, then the eggplant slices, then the mozzarella and then the parmesan romano until the dish is full or the ingredients are exhausted – whichever comes first. Bake for around 45 minutes or until the top is browned.
Do you have a favourite family recipe?
If food blogging means you can fly the length of this great brown land to spend the weekend eating and drinking yourself stupid with kindred foodie spirits you’ve met once, then I don’t see a downside.
I spent last weekend in Perth with two awesome food bloggers, hosts, tour guides and, dare I say it, friends Heather and Ai-Ling, who showed me all ‘the good Perth’ has to offer. We did cafes, small bars, markets, breakfast, the list goes on. They planned out every minute of my trip but somehow it was a laid back weekend. Seriously guys, get your foodie tours of Perth business going soon. You’d make an absolute mint.
At the Subiaco farmers’ markets, I picked up a swag of corn cobs and limes. I had no plans for them, other than perhaps to grill them on the BBQ. After a night stumbling through small bars and drinking out a of jam jars we found ourselves in a bookshop and I found myself thumbing through Lonely Planet’s ‘The World’s Best Street Food’, where a recipe for elote (corn cobs) caught my eye.
This Mexican/US recipe is the kind gracing the menus of many an up-to-the-minute dive bar or slider-serving eatery in urban Australia these days. Now you can start your own Americana/Mexicana shack right in your own living room with the surprising flavour combo of corn, lime, mayo and cheese. Elote goes great with any virtually flavourless cerveza such as Mexico’s Corona or Korea’s Hite (but for God’s sake, not Quilmes, NEVER EVER drink that), just stuff a lime wedge down the bottle’s gullet for a bit of zing. We ate these on the beach in Perth at the end of a long hot day, watching the gorgeous sunset over the sea.
Elote asado
Grilled corn cobs
(Adapted from Lonely Planet’s The World’s Best Street Food)
Makes 12 mini cobs
You will need:
4 large corn cobs, husks on (each whole cob should make 3-4 mini cobs)
4 juicy limes, cut into quarters – ¼ of a juicy lime per ‘mini cob’
About 8 teaspoons of mayo – about ½ teaspoon per cob find out how many cups this is!
100g freshly grated parmesan or romano cheese – I used pecorino
Heat up your grill or BBQ until it is quite hot. Place the cobs, in their husks, on the grill, turning every few minutes or so. They will take a long time to cook, probably 30 or 40 minutes depending on the heat of your grill, but trust me, it is well worth the wait to have those gorgeous charred morsels popping in your mouth. You will know when they are ready when the husks are blackened and burnt to a crisp.
The cobs will be quite hot so you will may need to wear oven gloves to remove their husks. You could also wait a while and let them cool slightly, but the joy of eating the corn hot is kind of the point and anyway, after waiting so long for them to be ready, you’re probably starving. De-husk them ASAP and cut them into thirds or quarters.
The rest is simple – rub each mini cob well with a lime wedge, smear on some mayo and then roll it in grated cheese. Serve immediately and with beer.
As this is a street food there are many variations. Most commonly lime, sour cream and chilli powder are used. You can also use salt instead of cheese. Go nuts!
I don’t know about you, but travel for me is mostly about food. When I eat the thing from the place in the actual place of the thing, well, that’s not a very articulate way of putting it, but in the words of Maeve O’Meara, it’s a revelation. And there’s no better way to attempt to relive your travel than to eat the thing that you ate in the place of the thing, but this time, eat it at YOUR place.
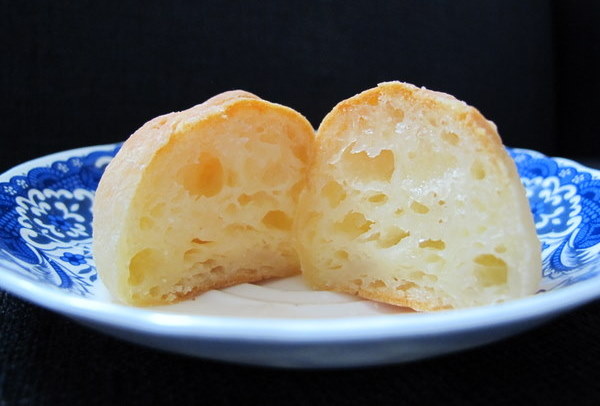
I found myself at a bit of a loose end this week, so I decided to make Pão de Queijo (Cheese Puffs), a typical Brazilian snack/breakfast food which I don’t even particularly like, but I wish I was in Brasil right now and what better way to celebrate that than to bake. The main ingredients are manioc/tapioca starch, cheese, eggs, liquid and fat.
When baked, they look a lot like profiteroles but, although the method is similar, it is a hell of a lot more difficult as the starch makes the dough sticky and you have to knead rather than just stir it. I found this virtually impossible so I would recommend using a food processor. Pão de Queijo has a wonderfully squishy texture and these puffs are yummy straight from the oven or reheated in the microwave.
A quick tip: all the recipes I’ve read say not to let the dough sit (it doesn’t need to rise or anything); either bake it immediately or form it into balls and freeze because if you let it sit, it will magically re-liquidise!
Pão de Queijo (a combination of online recipes, this one and this one were particularly helpful)
2 cups full cream milk
½ cup melted butter
450g tapioca/manioc starch (often called tapioca flour, make sure you get one that has the texture of cornflour rather than the one with the texture of polenta),
Excess tapioca/manioc starch for shaping the dough into balls (you can also use oil or water)
3 eggs
2 cups grated cheese (traditionally queijo de minas, but I used a combination of Colby and Romano, mostly Romano)
Preheat the oven to 200°c.
In a medium pan, bring the milk and butter to the boil. Remove from the heat immediately.
Either take your chances and gradually pour the manioc flour into the pan, stirring constantly or put the manioc flour in the food processor and on a slow speed gradually pour in the hot liquid.
Allow to cool; the dough should be cool enough to knead.
Next, knead the dough or turn the food processor on to a medium speed. Add the eggs, one at a time, incorporating each egg completely before the next egg is added. The dough should be smooth and elastic but still very soft and sticky. Add the cheese and knead well until completely incorporated.
You now have 3 choices – flour your hands with tapioca flour, oil them or dampen them. Then roll the dough into even, 2-3cm balls and place on a baking tray lined with baking paper or a silicone mat.
Bake for about 20 minutes, checking after ten minutes to make sure they are not over browning. They are done when they sound hollow when tapped, as they cool they will soften. Freeze or store in an airtight container, best served warm or reheated for 10 seconds in the microwave.
Makes about 30.
What foods from your travels do you love to cook?
When I was a vego, I cooked heavy on the cheese. Although I didn’t eat a lot of it by itself, it was in or on anything it could be. I remember when I was 13 or so cooking up a pot of thick tomato pasta sauce and thinking to myself ‘What if I added tonnes of cheese to this?’ It was, in the words of Maeve O’Meara, a revelation.
It was a habit I had break when I moved in with my boyfriend, who was aghast at how much cheese I put in everything. Very early on in our relationship I made him Pizzoccheri, a dish from of Grandfather’s family made of buckwheat pasta, potatos, cabbage, garlic, and lashings of melted butter, cubed fontina and grated parmesan. And when I say lashings, I really mean lashings. My biggest mistake was letting him watch me make it. Although he said it was lovely, I could see him shudder as I poured about half a cup of melted butter over the dish. Not exactly heart smart.
These days my main cheesy outlet is romano or parmesan on pasta – I just can’t help myself. I love how cheese can take a plain, usually carb-based dish and turn it into something special. And this is definitely the case with arepas.
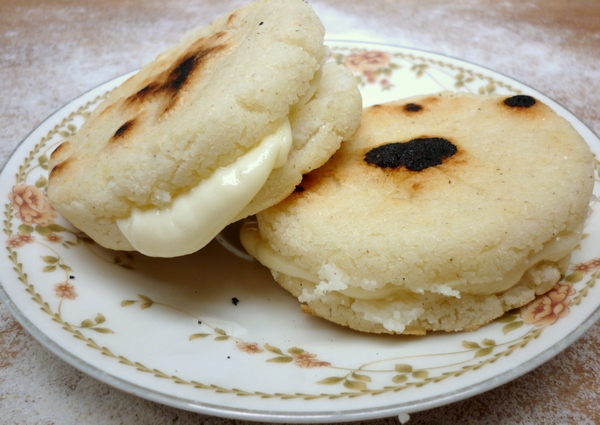
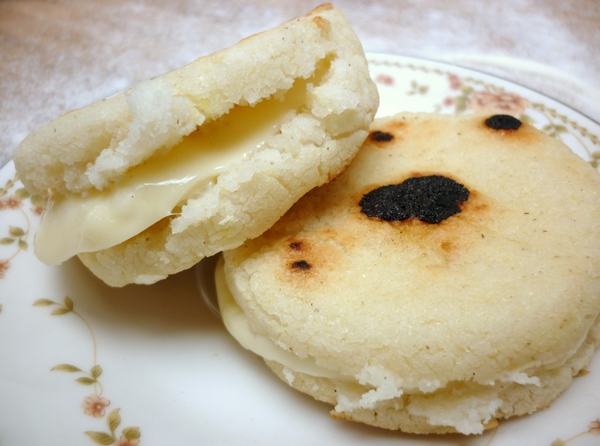
Arepas are made all over Colombia and Venezuela and often contain cheese, either mixed through the dough or stuffed in afterwards. They can also be stuffed with a variety of other fillings such as avocado, meat, black beans or fried eggs. They are commonly eaten as snacks or for breakfast but also can form part of a meal. They can be pan fried or deep fried and are both a street food and made at home as they are very easy to make and, in counties with corn as a staple, incredibly cheap. They are also mass produced, in fact, there is even a company in Brisbane that makes them, Grandma ¡Arepas!.
Arepas rellenas de queso (Arepas stuffed with cheese)
2 cups of Harina P.A.N. (pre-cooked white cornmeal)
2 ½ cups lukewarm water
1 teaspoon salt
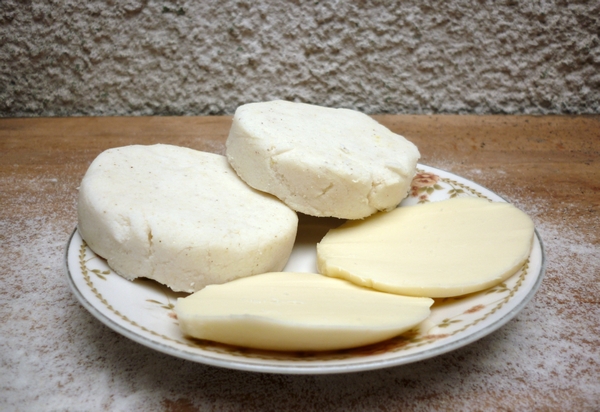
8 slices of cheese (just smaller than the palm of your hand. I used provalone because it is round and also a bit ‘stringy’)
Pour the water into a large bowl and stir in the salt. Slowly pour in the white cornmeal. I assume this is to avoid lumps, but I’ve done it in reverse order and there was no discernible difference.
Knead the dough until smooth. It will be a bit sticky, so let it sit for a few minutes if you like.
Preheat a frypan to a medium high heat. You could also use a bbq if you want to do them all at once.
Meanwhile, divide the mixture into 8 balls and shape them by hand into flat patties. They should be the same thickness all the way through, about 1-2 centimetres thick and perfectly round. An easier method is to line an egg ring (for frying eggs) with cling wrap and push the balls of dough into shape using that.
When the pan is hot enough, place the arepas in. When they start to ‘pop’ or dance, flip them. They should be browned and have a thick crust, like ‘giraffe skin’. Continue in batches until all are cooked
Allow the arepas to cool slightly, cut open and fill with cheese. You can return them to the heat briefly if you want the cheese to melt.
What’s your favourite cheesy indulgence?
In Argentina I met an English girl who said that Australia was the first place she ever tried Greek Yogurt. What’s more, she hadn’t had it since. She said she couldn’t wait to get back here to eat Greek yogurt every day! Frankly, I don’t blame her. It’s rich, creamy and tart with the thick lusciousness of sour cream- there’s nothing like it.
The availability of Greek food in Australia is not at all surprising when you consider the number of immigrants and their descendants living in here – Melbourne, for example, is the city with the second largest Greek population in the world. There is a large Greek population in Sydney as well, and a myriad of restaurants and ingredients available very easily if you’re interested in cooking Greek food. This is one of the major benefits of living in this country- diversity of food. You’re hard pressed to find a town where you can’t find a veggie burger or a machiatto or, in my friend’s case, Greek yogurt. This is something that we now take for granted and in many cases, never give a second thought.
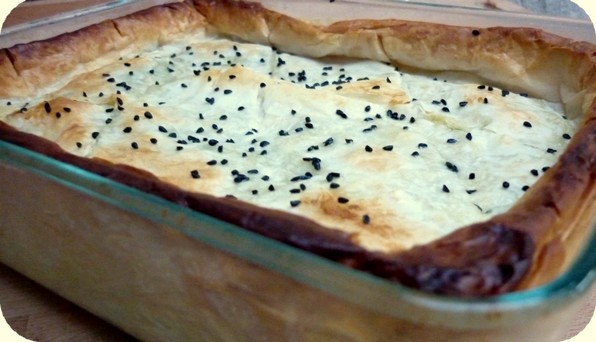
It is also one of the major ways people understand multiculturalism. Food is a valuable way for different communities to promote their cultures, as everybody eats and it is considered a starting point for greater familiarity with a culture to experience their food. Of course, it is also only the tip of the iceburg- 20 kinds of cuisine in one place does not a multicultural society make. That’s what we call a food court. I love this recipe for it’s simplicity and the burst of flavour provided by the dill. It is best eaten fresh from the oven, crispy and golden but also makes a brilliant cold lunch if you have any leftovers.
Never fail Spanikopita by Dimitra Alfred, via the SBS Food Safari website
2 bunches English spinach (300g or so)
4 sprigs fresh dill, chopped
4 spring onions, chopped
300g feta cheese
100g ricotta cheese
50g (½ cup) finely grated hard cheese like kefalograviera (I used Pecorino)
5 eggs
2 tbsp dry breadcrumbs (I used matzo meal as I had no bread crumbs on hand)
¼ tsp ground nutmeg
½ tsp freshly ground black pepper
60ml olive oil (4 Tablespoons)
375g packet fresh fillo pastry
Around ¾ cup melted butter
Sesame or nigella seeds, for sprinkling over the top.
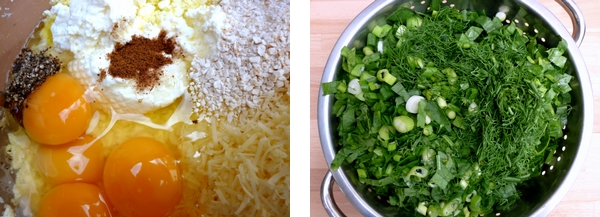
Chop the spinach, dill and spring onions very finely. Rinse in a large colander and leave to drain.
Place the feta in a large bowl and mash coarsely (I use a fork). Add the ricotta, hard cheese, eggs, breadcrumbs, nutmeg, pepper and oil. Mix with the fork to combine. Add the spinach.
Preheat oven to 180C. Lightly grease a 20cm x 30cm x 5cm deep baking dish or, as I did, two pyrex 6-cup rectangular dishes. Lay the fillo out on a bench. Cover with a damp tea towel to keep it from drying out.
Line dish with a sheet of filo and butter the filo with a pastry brush. Continue layering until about half the sheets of fillo are used (6 to 8). I cut the filo in half with scissors as I was using two dishes.
Using your hands, gently mix the spinach filling into the cheeses until thoroughly combined. Pour into the prepared pastry base and spread evenly.
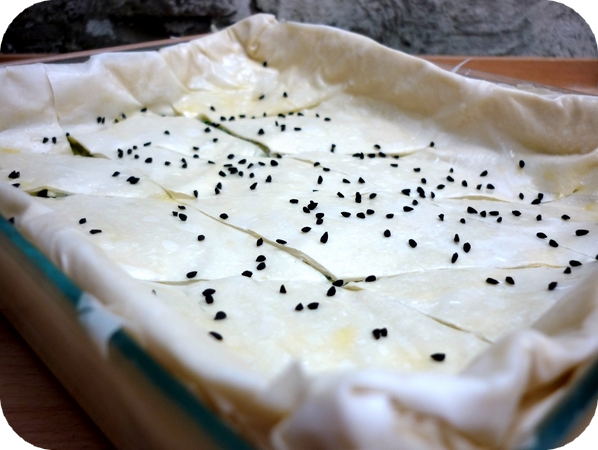
Top with remaining filo, buttering each sheet, ensuring the final sheet is well buttered. Trim any overhanging pastry and tuck in.
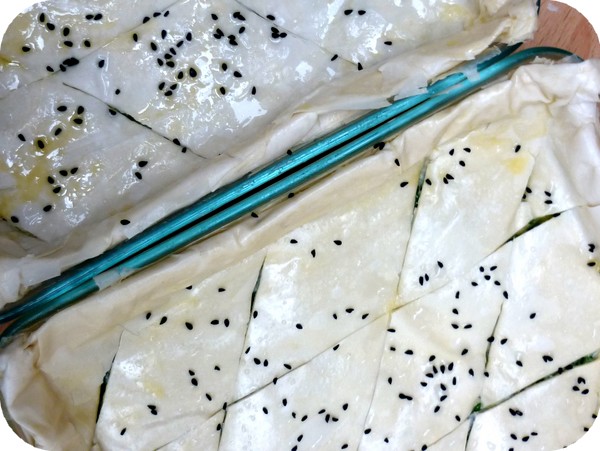
Use a sharp knife to mark pastry top into diamonds, allowing the knife to pierce the pastry once or twice to allow air to escape during baking. Sprinkle lightly with water, sesame seeds and a few nigella seeds and bake in preheated oven for 45 minutes to 1 hour or until well browned and set.
Gently shake the pan and the spanakopita will slide easily when cooked. Cool on rack for 15 minutes before cutting to serve.
Are there any delicious treats you miss from your overseas adventures?
About me
 Sharing easy recipes, hunting down the best coffee. Honest accounts, nothing too serious. Read more...
Recent Posts
- Aerpress means no more shit #travelcoffee and #workcoffee
- Why I write and four ace bloggers who do it better
- The five best things I ate in London
- Shoreditch is awesome, airports are not
- I quit sugar? Do I bollocks.
- Cubao Street Food, Alexandria
- The Reformatory Caffeine Lab, Surry Hills
- Brewtown Newtown
- Stay caffeinated over Christmas
- Gumption by Coffee Alchemy, Sydney CBD
Popular posts this month…
 Review – Philips Saeco Intelia posted on January 10, 2012
  Kosher Whole Orange Cake posted on July 5, 2011
  Sparkling Long Black posted on May 10, 2011
  The quest for Mex part 2 – Feisty Chicken Burritos posted on December 21, 2010
  Vella Nero Coffee Couture, Sydney CBD posted on June 28, 2011
  Fairy Bread posted on March 11, 2011
  The quest for Mex part 1 – Mexican Red Rice posted on December 17, 2010
  Gumption by Coffee Alchemy, Sydney CBD posted on December 13, 2013
Disclaimer:
All opinions in this blog are mine, an everyday, real-life person. I do not accept payment for reviews and nor do I write sponsored posts. I do not endorse the content of the comments herein.

