Although there’s a lot to be said for ratios and technique, especially when it comes to baking, sometimes, you look at a recipe, and you just can’t help yourself- you want to adapt it before you’ve even made it once.
That was the case with this cake; I found a recipe for Peach & Yogurt slice and I thought, fuck it, I know I’m right about this. I just knew I wanted more cinnamon. I didn’t feel like creaming butter and sugar. Greek yogurt comes in 200g or 500g or 1 kilo tubs, so I was gonna make it with 200g yogurt, not 250g. I wanted more vanilla, and I thought it would still be too plain, so I sloshed in some botrytis. I don’t like to cook with baking powder if I have SR flour on hand, so I used that instead.
It’s always a good idea to cook with what you have on hand, and what I’ve had on hand lately is peaches. We shop at Aldi a lot of the time and for some things, you have to buy a kilo or more; stone fruit is one of these things. For some reason, fruit in our kitchen is invisible to my partner, so I’ve been eating a lot of peaches lately, thus this cake was born.
If you don’t have peaches, nectarines or plums, you could easily use pears or apples (maybe cook the apples a little first) or berries. Frozen fruit could also work well here, or tinned fruit at a pinch, although you would get a much gooyer fruit top. Whatever you top is with, this cake is moist and light from the butter/yogurt/SR flour combo, and has just enough cinnamon and sweetness to make it anything but dull eating. Serve with a cup of tea if that’s what floats your boat.
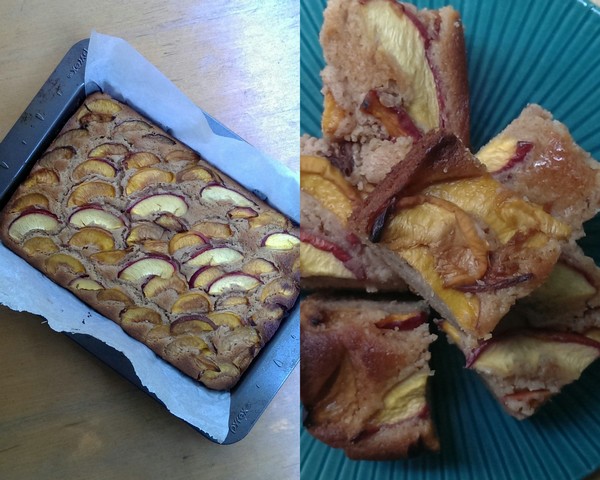
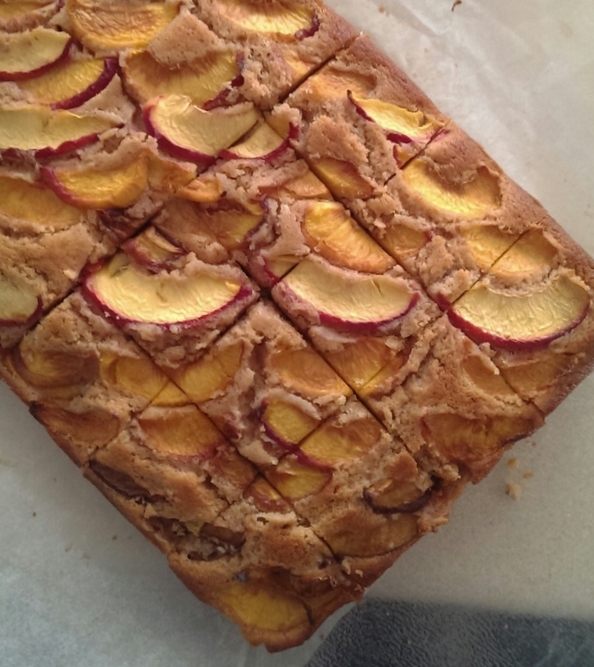
Peach and Cinnamon Cake
Adapted from this recipe
3 eggs, at room temperature
1 cup caster sugar
2 Tbsp vanilla extract
2 Tbsp botrytis or other sweet white wine
200g ‘normal’ (salted) butter, melted and then left to cool slightly
1 ½ cups self-raising flour
1 Tbsp ground cinnamon
200ml full fat greek yoghurt
3 (about 250g) peaches or other stone fruit, halved, stones removed, thinly sliced
Grease a 20 x 30cm slice pan and line the base and 2 long sides with baking paper, allowing the sides to overhang a little. Preheat oven to 180°C.
Whisk the eggs until pale and quite frothy. Continue to whisk, slowly adding the sugar bit by bit. Whisk until all sugar is properly incorporated; more or less dissolved. Add in extract and wine, mix through. Do with the melted butter as with the sugar; continue to whisk the egg mixture, slowly pouring in the cooled butter in a thin stream.
Sift in the flour and cinnamon and fold through with a spatula. Next fold through the yogurt, mixing until completely incorporated.
Spread the mix into the lined tin, tapping on the bench toremove any air bubbles. Press the sliced fruit into the top of the mixture. Bake for 45-50 minutes, or until golden and almost firm. Set aside the cool for a few minutes, then pull it out of the tin (using the overhanging baking paper) and let cool on a wire rack. Slice into squares and serve.
Bircher Muesli (Birchermüesli) was invented by Maximilian Oskar Bircher-Benner in the 19th century and is traditionally a mix of oats, milk, sweetener and grated apple. These days it’s a hipster’s delight of a breakfast food that’s absolutely perfect for anyone who:
a) wants something filling for breakfast,
b) wants to eat something healthy for breakfast, and
c) only wants to make breakfast once every few days.
I make up 3 days of my bircher every Monday for the perfect balance of organised/lazy food prep. This is because I work 3 days in the office and I want to make and take brekky with me once and once only. If you want to make enough for 5 days because you work a normal-person schedule, divide the amounts by 3 and multiply by 5.
This recipe lends itself to substitution, as long as the ratios are right. And the best thing about it? It tastes better over time – your third day of eating this it’s going to taste so much better than the first day. That gives you a brekky to look forward to more with each day of the week!
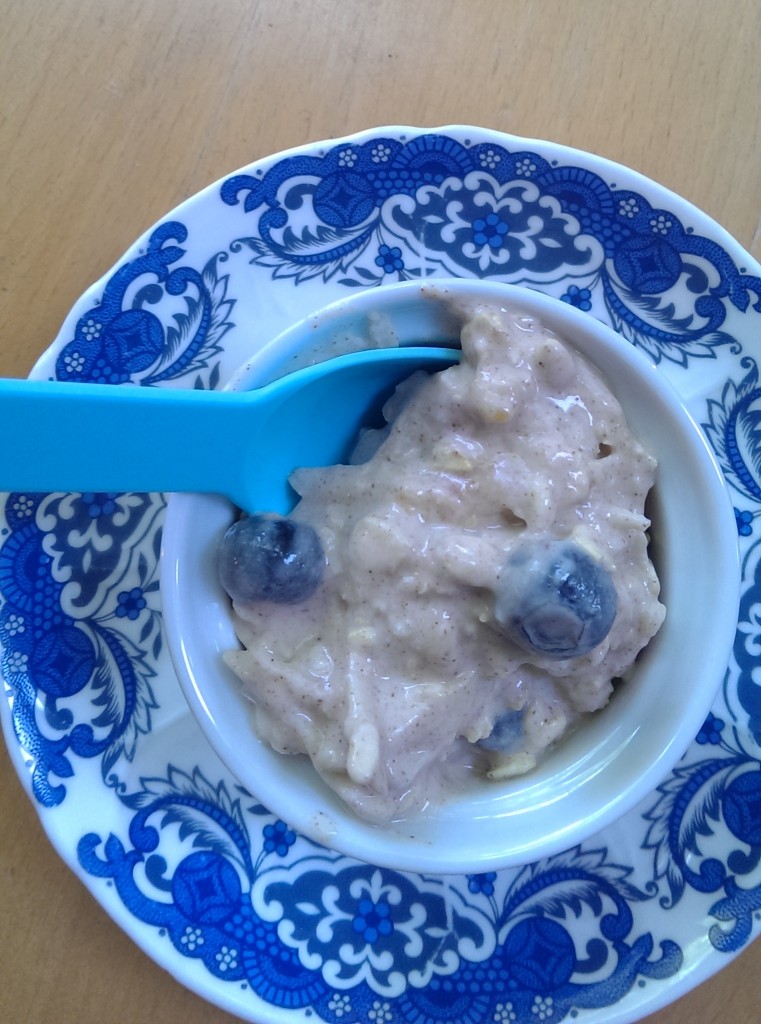
Lau’s 3-day bircher
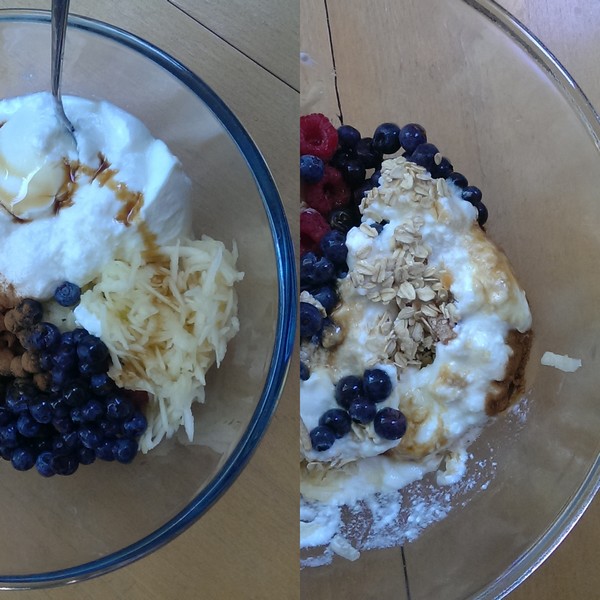
2 medium apples, peeled
1 punnet (125g) fresh blueberries
1 cup of untoasted meusli or, failing that, rolled oats
2-3 Tablespoons ground cinnamon
1 teaspoon vanilla extract or honey
500g plain yogurt (I use the fat free pot set kind)
In a large mixing bowl, grate two apples. Add in the rest of the ingredients and stir well, until completely combined.
Spoon the mixture into an airtight container and refirdgerate, eat over the course of 3 days. Keeps for one week.
What’s your go-to breakfast?
Sometimes you wake up, maybe a touch under the weather, and you want a bit of brunch, but leaving your house seems like an impossible task. You drag yourself to the kitchen and find the cupboards and fridge are more or less bare – sure, you’ve got eggs, some random veggies, and all the oils and spices you could ever need, but these ingredients do not brunch make. Or do they?
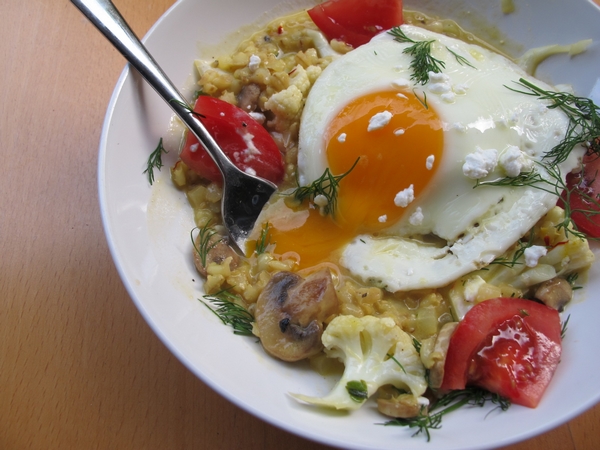
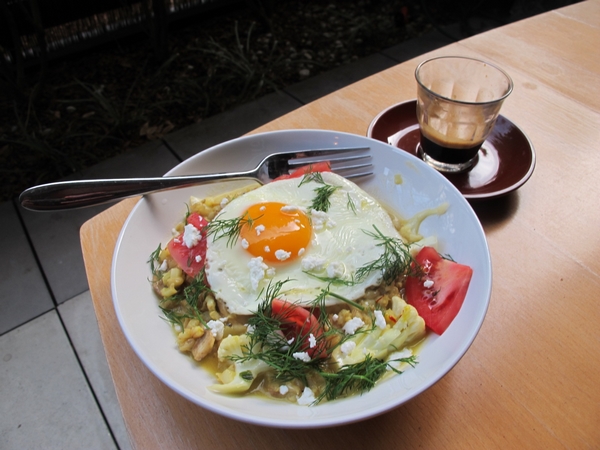
Orzotto is a risotto made from barley and it’s damn tasty. I’ve made it from scratch (using raw barley) but you can also do it with leftover cooked barley, which is how this recipe came about. And I see no reason why you can’t eat it for brunch.
I’ve even made it extra flexible with ingredient options so that you don’t have to leave the house tomorrow morning. You’re welcome.
Bits-and-bobs Orzotto for one
A splash of oil and a smidge of butter
A pinch of salt
A spoonful of diced onion – you could also use fennel, capsicum, celery or garlic
A pinch of chopped parsley
A pinch saffron threads, soaked in ¼ c white wine
1 cup stock/water
4-5 tablespoons leftover cooked barley, or other whole grains/equivalent – eg, brown rice, farrow, quinoa, couscous, risoni…
3-4 florets of cauliflower – you could sub in brocolli, kale, brocolini, bok choy, asparagus.
1/2 a tomato, cut into wedges. You could also use beetroot, pickled onions or other pickles.
One egg
pepper and salt
fresh herbs, to garnish
butter, to add at the end
goats cheese/feta/other cheese, to serve.
Add the cauliflower florets (or whtever you’re using) to a bowl of salted warm water.
Heat oil and butter. Add a spoonful diced onion and a pinch of salt. Cook until translucent.
Boil a jug of water.
Add the cooked grains to the pan, heat through.
Add wine mix and parsley, freshly ground salt and pepper, simmer
Add water/stock, spoonful by spoonful, stirring as it is absorbed.
In a small frypan, put an egg on to fry.
Add the cauliflower into the orzotto.
Once egg is nearly done, cover, turn off heat on both pans. Add butter to the orzotto.
Assemble- orzotto, egg on top, tomato around, fresh herbs, sprinkle goats cheese.
What’s your fave homemade brunch?
The point of the lamington is to use up old sponge cake. Who in the hell has a heap of old cake lying around? No one. That’s why I neither like nor understand the lamington; the basic concept baffles me. In fact, I’d never even made a batch before this post.
The point is, whether it makes sense or not, that is what a lamington is. I will defend to my death the authentic/traditional ‘Strayun lamington recipe as made perhaps not on its first occasion but ever after.
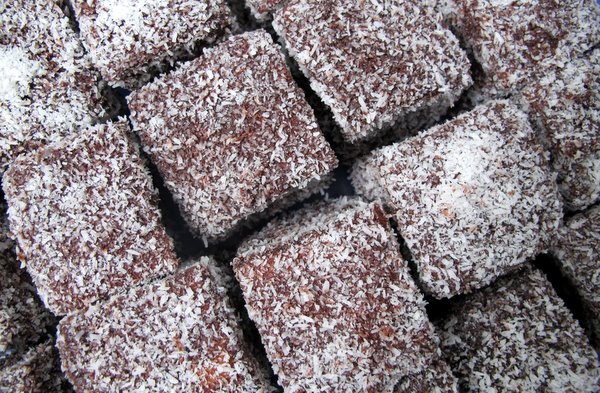
Here’s how it goes- sponge cake, chocolate icing and dessicated coconut. I cannot stress this enough. It is integral to both the flavour and texture of the lamington. But recently, in trendy cafes and even, shock, horror, on food blogs (even ‘Strayun ones), I have come across furry, rather than fuzzy lamingtons – they have been using shredded coconut, not dessicated. For shame.
In actual fact, my recipe is not even a recipe for lamingtons, it’s pretty much a recipe for icing. Because if the point of the lamington is to use up stale cake, you might as well just buy a sponge cake from the shops and be done with it. I did. Even so, this recipe is truer to form than the spiky, echidna-like lamingtons I’ve had the displeasure to witness in recent times.
You may add whipped cream or some raspberry or strawberry jam in the centre of the lamington, no worries mate, but for God’s sake, stick to the tried and true recipe. Don’t mess with a good thing! After all, it is Australia Day.
Lamingtons (icing recipe from the Australian Women’s Weekly)
1 x 450g sponge cake (mine was a pack of two rectangular sponges)
4 cups icing sugar mixture
1/2 cup cocoa powder
1 cup milk
15g butter
2 cups dessicated coconut
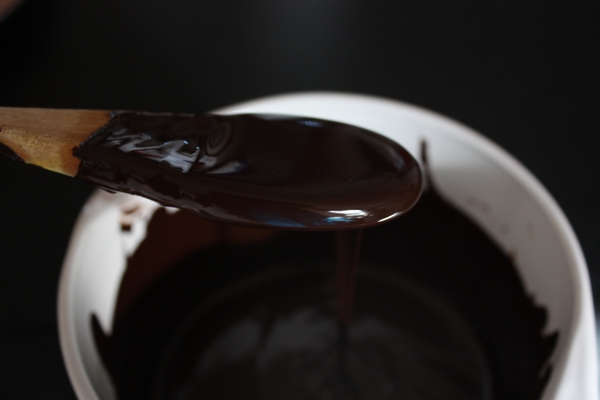
Sift the icing sugar and cocoa in a large heat proof bowl. Stir in the milk and add the butter.
Over a simmering saucepan (double boiler) stir the mixture until the butter melts and you have a smooth icing. Set aside.
Cut the sponge into even pieces with a sharp knife, I got 24 pieces in total.
Coat the sponge with icing, letting the excess drip off, coat in coconut and leave to rest. See below for more details.
embedded by Embedded Video
YouTube
Happy Australia Day!
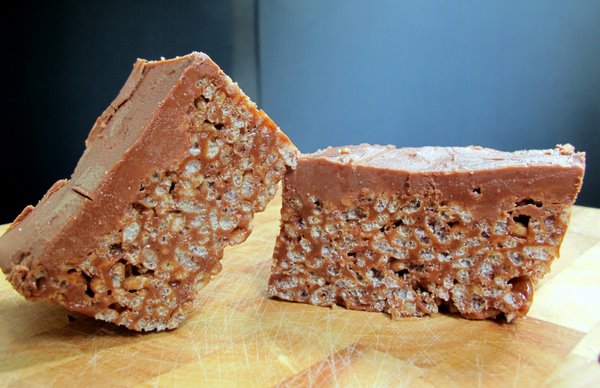
You know, I’d like to just open this post by saying that mars bar slice kicks chocolate crackles’ arse. If there was ever a fight to the death (a fight of deliciousness, that is) between treats containing rice bubbles, there would be no contest. Maybe it has something to do with copha, that gritty vegetable shortening that holds a chocolate crackle together (ew). Or maybe it’s the contrast between chewy/crunchy/salty/sweet that mars bar slice has. And if melting down a a shitload of mars bars and butter doesn’t seem decadent enough, maybe it’s that extra layer of chocolate on top that really seals the deal.
Whatever the reason, mars bar slice is the eternal crowd pleaser. Unless your’e diabetic. Or lactose intolerant. or don’t like chocolate. OK well, let’s just say we’re in a crowd of sweet tooths with no discernable allergies.
Mars Bar Slice from Exclusively Food
120g butter
270g Mars Bars
1 1/2 tablespoons (30ml) golden syrup
3 3/4 cups (120g) rice bubbles
For the topping:
225g milk chocolate
20g butter
Boiling water
Grease a 16cm by 21cm baking tray/pyrex dish, or anything roughly that volume.
Place butter, Mars Bars and golden syrup in a saucepan over medium heat. Stir constantly with a whisk. You will know when it’s ready as not only will the lumps of nougat melt, but the whole mixture will suddenly gel together, thicken and become smooth and homogeneous. Turn off the heat.
Add the rice bubbles to the Mars Bar mixture and gently stir to combine, trying not to crush the rice bubbles.
Melt the chocolate and butter in the microwave, stirring every so often until smooth and liquid.
Press mixture firmly into the greased pan. Spread slice with topping and refrigerate overnight.
To loosen the slice, fill your sink with boiling water and place the slice, in its tray in the sink for a couple of minutes to loosen it. Turn it out onto a chopping board and slice to the desired sized pieces, dipping a sharp knife in a cup of boiling water in between slices. the slice will be quite hard, either wait 10 minutes or cut with a sawing motion. Store in an airtight container in the refrigerator.
Tip: You could use baking paper rather than greasing the pan, this will be a hell of a lot easier as long as you have some overhang.
Want to know more about the death by chocolate blog hop? Find out more more over at The Hungry Australian.
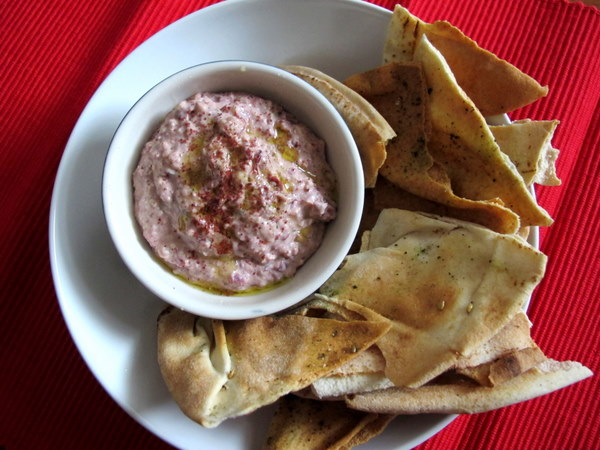
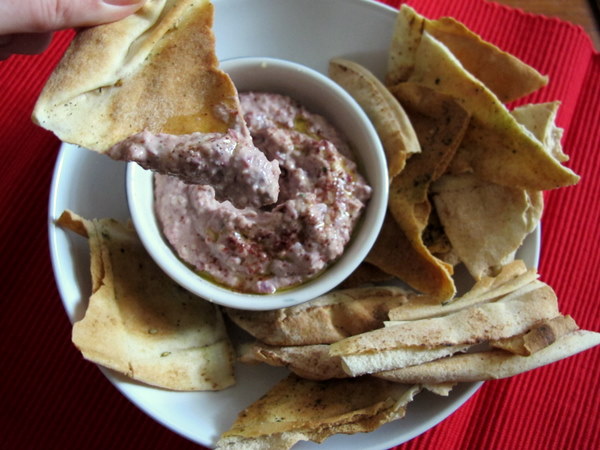
Home made Hummus. It’s one step up from buying a tub of dip and a box of crackers, and yet somehow, platingt up seems so much more decadent, like a special occasion. People don’t generally expect home-made snacks, as shop-bought snacks are neither rare nor expensive nor difficult to come by.
This recipe came from a supermarket magazine, either a Coles or Woolworths one (I’m sorry, I can’t recall, I only have the clipping). It never fails. It’s great with pita shards or carrot sticks if you’re feeling particularly virtuous. I’ve served it here with some awesome Multigrain Struan that I made in a Brasserie Bread Class the other day.
You could soak dried chick peas (it makes the hummus creamier). You could add coriander (it adds complexity). You could use lemon instead of limes (it’s a tad more exotic). But sometimes, isn’t it nice to serve up something plain, simple, spur-of-the-moment and yet somehow impressive? Classics are often classics for a reason.
Quick tip: use middle eastern tahini/tahina rather than the rock solid stuff my mum used to buy in health food stores. It’s often more expensive than ‘anglo’ tahini (is there such a thing?) but it’s much creamier. Just give it a stir, it’s infinitely more stirrable as well.
Piss-Easy Hummus
1 tin of chick peas, undrained
The juice of one lemon
1 Tablespoon Tahini
1 garlic clove, quartered
1-2 Tablespoons extra virgin olive oil
A food processor or immersion blender
Process the chickpeas with half their liquid and all other ingredients. Serve drizzled with olive oil and sprinkled with paprika.
There are some recipes that are solid crowd pleasers, and these are the ones I tend towards when it’s time to celebrate something. This orange cake, which I first saw on Food Safari is a classic Jewish Middle Eastern cake made of Oranges, almond meal, sugar and eggs. It takes about 10 minutes to throw together and although it’s been blogged to death, I can’t resist posting it here. Believe the hype, I’ve made this cake more times than I can count and I’m not about to stop now.
The flavour is intensely orange, the texture is creamy and dense. One tip though; make sure you don’t use oranges with very tough, thick skins, as this will give a bitter flavour. I once made this cake with very thick-skinned oranges (I didn’t realise it at the time) and although it was still tasty, it left a bitter aftertaste that I wouldn’t want you to repeat…
Kosher Whole Orange Cake – Batia Slater via SBS Food Safari
2 oranges
6 eggs
250g caster sugar
250g almond meal
1 tsp baking powder
Baking paper
Canola spray (for greasing the pan)
Wash the oranges and place unpeeled, in a pot of water. Bring to the boil and simmer for 2 hours. Drain the water and allow the oranges to cool for at least 10 minutes. You can boil them ahead of time if you prefer.
Preheat oven to 190°C. Grease a 20 cm round baking tin with canola oil spray, cut a circle of baking paper and place it in the bottom of the tin (use the tin as a template).
Break 6 eggs into a mixing bowl. Add caster sugar and blend together with an immersion blender.
Place the two oranges into the egg mix. Break up the oranges and then blend together to a smooth consistency. Add the almond meal and baking powder and blend.
Pour batter into the pan and bake for 45 minutes to an hour and a half or until the top is golden brown. If it starts to brown too early or too much, cover it with foil. Makes 16 slices.
Ever had an impromptu gathering? Inviting people to stay for dinner seems like a grand idea after a few glasses of wine. As you traipse merrily into what passes for a kitchen at you price point and browse through what could be considered a pantry in the broad sense of the word, it still seems like an ok idea. It isn’t until you open the fridge and you eyes settle on its only contents: a shrivelled bunch of buk choy and half a tub of greek yogurt that you realise there isn’t anything in your house that a normal person would consider dinner. And that’s when you panic. Or have another glass of wine.
It’s in these situations that a well-stocked pantry, although seemingly bereft of food can save the day. Tins of chick peas, oils, spices and some ancient pita bread from the freezer can come together so that you have something resembling those wanky chucky dips and pita chips that cost about $5 a pop in the supermarket.
But the truth is, at impromptu gatherings no one cares what they eat. When people weren’t expecting a meal, anything you give them is a bonus. This recipe has saved me many a time in such situations. It’s a great snack to crunch on while you peruse the takeaway pizza menu and open that next bottle of vino…
Pita Shards
2-3 pita bread
Olive oil
Salt
Za’atar (use dried oregano if you can’t find za’atar)
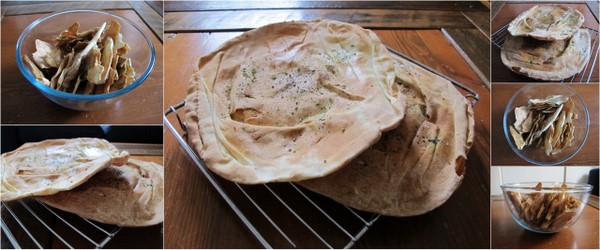
Turn on the oven to a reasonable temperature. Spray or brush one side of each pita with oil, sprinkle liberally with salt and za’atar and place, topping side up in the oven. Bake about 5 minutes. When dried but not too brown, turn over, spray/brush and sprinkle again and cook the other side.
Repeat with all pitas. When they are cool, smash them into shards. Store in an airtight container, not that you’ll have any leftovers.
Chunky Three Bean Dip
In a food processor, place:
About ½-1 cup salted cashews (or add some salt if they’re raw). Most nuts will work.
2 cloves of garlic, roughly chopped
A small handful of parsley (optional)
Blend until cashews are fine but still have texture.
Add:
1 can 3 bean mix (drained) – you can really use any can of beans you like
The juice of half a lemon
About a teaspoon of ground sumac
A slosh of extra virgin olive oil
Blend until thick and creamy.
At this point, taste the mixture. It’s probably too garlicky. I would add, while the processor is running:
2 spoonfulls of greek yogurt or sour cream if you don’t have any.
Cracked pepper
More olive oil
A dash of balsamic vinegar
A pinch of sugar or a teaspoon
Blend for a bit. Just make sure the mix stays thick, almost stiff and all will be dandy.
As the weather cools down, the rain pounds on the roof and my kitchen floods at regular intervals, it feels like the time to indulge in a slice of something sweet with a cup of something hot, the eternal combination of comfort seekers everywhere.
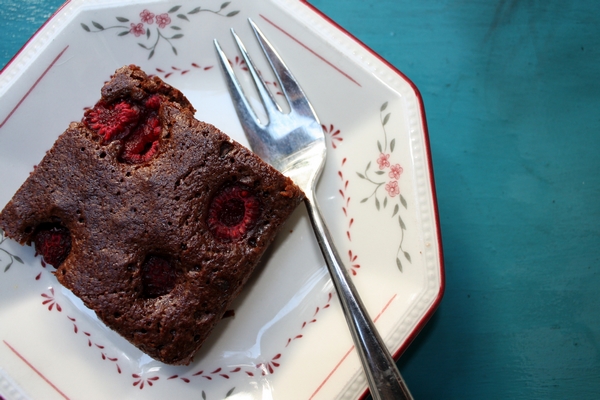
These brownies are ideal for weathering the storm – quick, easy and you don’t even have to have chocolate on hand to make them. They’d be perfect with a cup of tea if tea interested me in the least, but I prefer them with a coffee or a big glass of cold milk. That way I can either be an incredibly grown up or a 6 year old child, whichever seems easiest at the time.
Cocoa Raspberry Brownies (Adapted from The Stone Soup)
150g butter
1¼ cups 255g caster sugar
¾ cup (80g) cocoa powder
1 teaspoon vanilla extract
2 eggs
½ cup (75g) plain flour
1 cup frozen raspberries or morello cherries
Preheat oven to 150°C. Line a slice tin with two sheets of baking paper so that it overlaps the sides.
Melt butter in a medium saucepan. When just melted, remove from the heat and stir in the sugar and cocoa powder, ensuring there are no lumps.
Add the vanilla extract and eggs and mix well. Gently stir in the flour until just combined, being careful not to over mix. Pour the mixture into the lines pan. Dot the brownies with frozen raspberries.
Bake for 45 minutes or until the top feels just set. Cool in the tin, cut and then serve.
What’s your favourite wet weather recipe?
When I was a vego, I cooked heavy on the cheese. Although I didn’t eat a lot of it by itself, it was in or on anything it could be. I remember when I was 13 or so cooking up a pot of thick tomato pasta sauce and thinking to myself ‘What if I added tonnes of cheese to this?’ It was, in the words of Maeve O’Meara, a revelation.
It was a habit I had break when I moved in with my boyfriend, who was aghast at how much cheese I put in everything. Very early on in our relationship I made him Pizzoccheri, a dish from of Grandfather’s family made of buckwheat pasta, potatos, cabbage, garlic, and lashings of melted butter, cubed fontina and grated parmesan. And when I say lashings, I really mean lashings. My biggest mistake was letting him watch me make it. Although he said it was lovely, I could see him shudder as I poured about half a cup of melted butter over the dish. Not exactly heart smart.
These days my main cheesy outlet is romano or parmesan on pasta – I just can’t help myself. I love how cheese can take a plain, usually carb-based dish and turn it into something special. And this is definitely the case with arepas.
Arepas are made all over Colombia and Venezuela and often contain cheese, either mixed through the dough or stuffed in afterwards. They can also be stuffed with a variety of other fillings such as avocado, meat, black beans or fried eggs. They are commonly eaten as snacks or for breakfast but also can form part of a meal. They can be pan fried or deep fried and are both a street food and made at home as they are very easy to make and, in counties with corn as a staple, incredibly cheap. They are also mass produced, in fact, there is even a company in Brisbane that makes them, Grandma ¡Arepas!.
Arepas rellenas de queso (Arepas stuffed with cheese)
2 cups of Harina P.A.N. (pre-cooked white cornmeal)
2 ½ cups lukewarm water
1 teaspoon salt
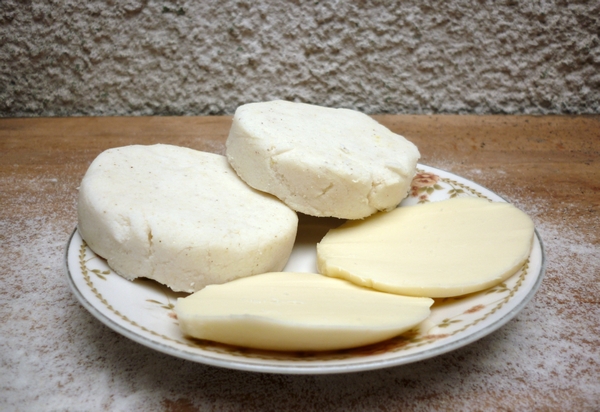
8 slices of cheese (just smaller than the palm of your hand. I used provalone because it is round and also a bit ‘stringy’)
Pour the water into a large bowl and stir in the salt. Slowly pour in the white cornmeal. I assume this is to avoid lumps, but I’ve done it in reverse order and there was no discernible difference.
Knead the dough until smooth. It will be a bit sticky, so let it sit for a few minutes if you like.
Preheat a frypan to a medium high heat. You could also use a bbq if you want to do them all at once.
Meanwhile, divide the mixture into 8 balls and shape them by hand into flat patties. They should be the same thickness all the way through, about 1-2 centimetres thick and perfectly round. An easier method is to line an egg ring (for frying eggs) with cling wrap and push the balls of dough into shape using that.
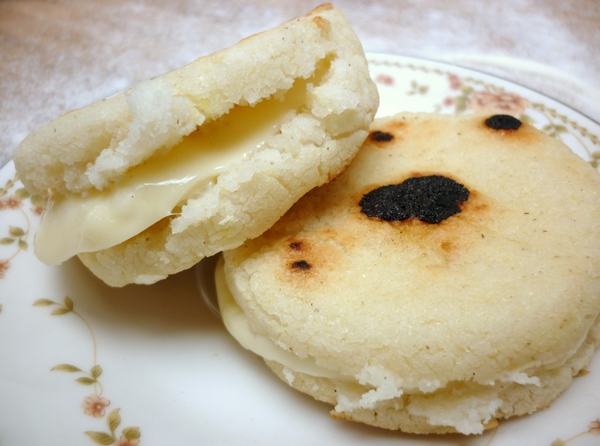
When the pan is hot enough, place the arepas in. When they start to ‘pop’ or dance, flip them. They should be browned and have a thick crust, like ‘giraffe skin’. Continue in batches until all are cooked
Allow the arepas to cool slightly, cut open and fill with cheese. You can return them to the heat briefly if you want the cheese to melt.
What’s your favourite cheesy indulgence?
About me
 Sharing easy recipes, hunting down the best coffee. Honest accounts, nothing too serious. Read more...
Recent Posts
- Aerpress means no more shit #travelcoffee and #workcoffee
- Why I write and four ace bloggers who do it better
- The five best things I ate in London
- Shoreditch is awesome, airports are not
- I quit sugar? Do I bollocks.
- Cubao Street Food, Alexandria
- The Reformatory Caffeine Lab, Surry Hills
- Brewtown Newtown
- Stay caffeinated over Christmas
- Gumption by Coffee Alchemy, Sydney CBD
Popular posts this month…
 Review – Philips Saeco Intelia posted on January 10, 2012
  Sparkling Long Black posted on May 10, 2011
  Kosher Whole Orange Cake posted on July 5, 2011
  The quest for Mex part 2 – Feisty Chicken Burritos posted on December 21, 2010
  Vella Nero Coffee Couture, Sydney CBD posted on June 28, 2011
  Fairy Bread posted on March 11, 2011
  Café review – Flint and Steel (Coffee Alchemy), Marrickville posted on March 1, 2011
  The quest for Mex part 1 – Mexican Red Rice posted on December 17, 2010
Disclaimer:
All opinions in this blog are mine, an everyday, real-life person. I do not accept payment for reviews and nor do I write sponsored posts. I do not endorse the content of the comments herein.

