I love the fact that I couldn’t explain to an outsider what exactly the building blocks of ‘your typical Aussie Christmas dinner’ are. It is, by and large, flexible. In fact, it may not even be a dinner, it may be lunch. It could be on boxing day rather than Christmas, and there may not even be a table at all; it could be on a beach, or in a park, or at a pub.
Every year in my family, we fling together something a little different from the year before. And every person I talk to has their different family traditions, dishes and recipes; some that stay the same year in year out, some that evolve, and some that they’d rather forget. I like to think that, as a group (cue massive generalisation), we Aussies are a laid-back, casual lot, and the variety of meals we share over the silly season reflects this flexible, adventurous way of looking at food, and recognises our diversity as a nation.
In a couple of weeks, I’ll be hosting a pre-Christmas recipe swap at the Glebe Library with the City of Sydney. We want people to bring in their Christmas recipes; the ones they love, the ones they hate, the ones they just made up yesterday. You can even bring samples to share, and we’ll eat and talk cooking and eating and Christmas. Huzzah!
If you can make it, here are the details
The Christmas Recipe Swap
Friday, 6 December 2013 from 1:00pm to 3:00pm
Glebe Library, 186 Glebe Point Rd, Glebe NSW 2037
What do I need to do?
- RSVP here
- If you have a recipe you’d like to share and need us to print, email it to lau@corridorkitchen.com by Thursday, 5 December 2013.
Hope to see you there, chums!
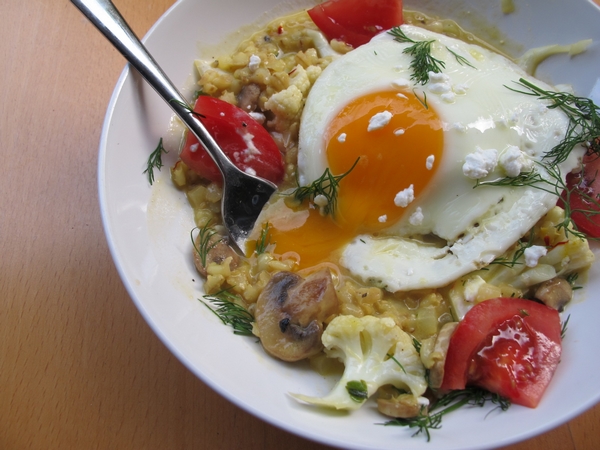
Sometimes you wake up, maybe a touch under the weather, and you want a bit of brunch, but leaving your house seems like an impossible task. You drag yourself to the kitchen and find the cupboards and fridge are more or less bare – sure, you’ve got eggs, some random veggies, and all the oils and spices you could ever need, but these ingredients do not brunch make. Or do they?
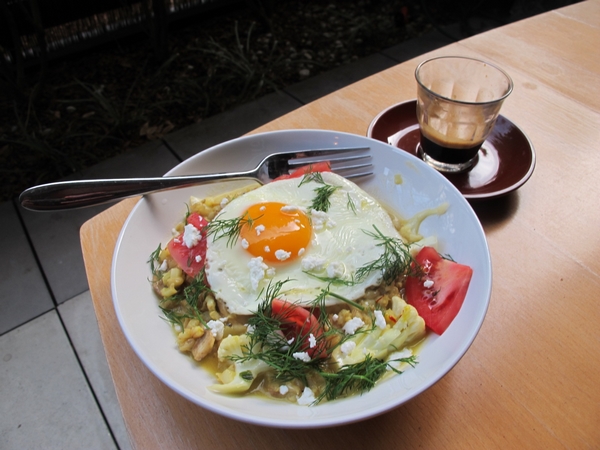
Orzotto is a risotto made from barley and it’s damn tasty. I’ve made it from scratch (using raw barley) but you can also do it with leftover cooked barley, which is how this recipe came about. And I see no reason why you can’t eat it for brunch.
I’ve even made it extra flexible with ingredient options so that you don’t have to leave the house tomorrow morning. You’re welcome.
Bits-and-bobs Orzotto for one
A splash of oil and a smidge of butter
A pinch of salt
A spoonful of diced onion – you could also use fennel, capsicum, celery or garlic
A pinch of chopped parsley
A pinch saffron threads, soaked in ¼ c white wine
1 cup stock/water
4-5 tablespoons leftover cooked barley, or other whole grains/equivalent – eg, brown rice, farrow, quinoa, couscous, risoni…
3-4 florets of cauliflower – you could sub in brocolli, kale, brocolini, bok choy, asparagus.
1/2 a tomato, cut into wedges. You could also use beetroot, pickled onions or other pickles.
One egg
pepper and salt
fresh herbs, to garnish
butter, to add at the end
goats cheese/feta/other cheese, to serve.
Add the cauliflower florets (or whtever you’re using) to a bowl of salted warm water.
Heat oil and butter. Add a spoonful diced onion and a pinch of salt. Cook until translucent.
Boil a jug of water.
Add the cooked grains to the pan, heat through.
Add wine mix and parsley, freshly ground salt and pepper, simmer
Add water/stock, spoonful by spoonful, stirring as it is absorbed.
In a small frypan, put an egg on to fry.
Add the cauliflower into the orzotto.
Once egg is nearly done, cover, turn off heat on both pans. Add butter to the orzotto.
Assemble- orzotto, egg on top, tomato around, fresh herbs, sprinkle goats cheese.
What’s your fave homemade brunch?
In case you were wondering, I have decidedly unexotic and Catholic heritage- generic Irish/English stock on my Dad’s side and on my Mum’s side, half Northern Italian and half more of the same. I am, as they say, an anglo mongrel, and the food I grew up on reflects that fact. I am sometimes accused, mostly jokingly but with a dash of truth thrown in, of growing up ‘without culture’ by my partner, his heritage being a mix of Portuguese and Iraqi Jew now considered exotic.
In a way, I think as Australians we shortchange ourselves when we say we have ‘no culture’. We have every culture, that’s the point, and we can serve it all up on a plate and pretend for five minutes that we are all friends. It solves nothing, but it feeds everyone. And there are things that I think all of us who love food understand. Many of the conversations we had growing up centred on food. What did you have for lunch, what should we have for dinner, have you eaten? These are universal questions for perpetually hungry and food-obsessed families, whatever their nationality.
Food for me is mostly all about my mother. It is the same for my partner, on the phone to his mum trying to suss out exactly the right methods or ingredients to get that thing she made for him as a kid just the way she made it. If we cook something our parents used to make, and try to make it the way they would when we were kids, it is kind of ritual, a kind of homage. Whether that thing be a sausage sanger or a perfectly rendered matzo ball, we can chow down on each with equal gusto.
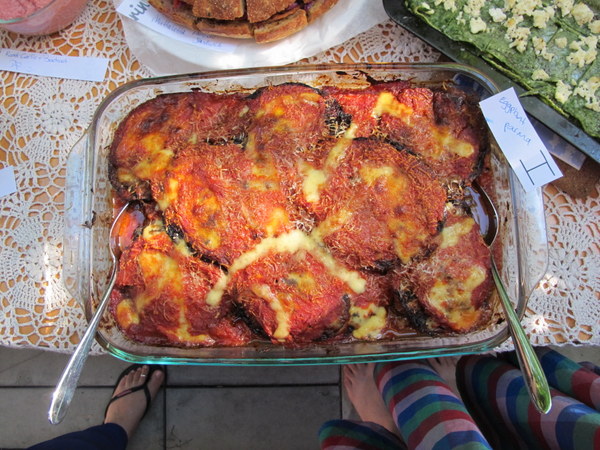
This recipe is basically eggplant parma, a combination of a traditional eggplant fritter recipe from my Grandfather’s family and the tomato sauce that we would eat in some form at least once a week when I was growing up. I would happily subsist on slow-cooked tinned tomatoes for the rest of my life, and this is one mind-numbingly delicious way of serving it.
Eggplant Parmigiana
Serves 8 generously, if served with salads and sides.
2 enormous eggplants, cut into ½ centimetre slices
1 egg, lightly beaten
1 cup flour
1 stale baguette, blended in the food processor
olive oil, for shallow frying
Extra virgin olive oil
2 small onions, finely chopped
pinch chilli flakes
pinch salt
6-8 cloves garlic, finely chopped
4x 400g tins chopped tomatos
1/2 cup red wine
2 sprigs rosemary (optional)
500g mozzarella, sliced
150g good quality parmesan or romano cheese, grated
Tip: You can either make the sauce first or take the ‘do everything at once approach’ outlined below, just keep in mind that the sauce should cook for at least an hour. The whole dish can be made a few days in advance; once everything is layered together, refrigerate and when you want to serve it, bring it up to room temperature before cooking.
Salt the eggplant slices well, layer on a plate and place a heavy object on top. Arrange three bowls on the bench, 1 with the flour, 1 with the beaten egg, and 1 with the breadcrumbs. Leave the weighted eggplant slices to sit for 20 minutes.
Heat the oil in a large pan. Cook the onions until translucent, then add the salt, chilli flakes and garlic. Cook until all ingredients are done but not brown. Add the wine to deglaze the pan, cook a couple of minutes. Add the tomatoes, give the tomato tins a bit of a rinse and pour the resulting water in too. Simmer the sauce for 45 minutes – 11/2 hours, adding in the rosemary about halfway through.
While the sauce is simmering, rinse the eggplants and pat dry. Heat the oil in a large frying pan to shallow fry the eggplant. Then it is just a matter of dipping each eggplant slice in flour, then egg, the breadcrumbs and popping them into the oil. Turn each slice over so it browns on both sides, and when done, put the slices on a plate lined with paper towel to drain well. This process takes about the same amount of time as simmering the sauce.
Remove the rosemary from the sauce, give the mixture a quick blitz with a stick blender if too lumpy, and leave to cool.
Preheat the oven to 180 degrees C. In a large baking dish, layer the sauce, then the eggplant slices, then the mozzarella and then the parmesan romano until the dish is full or the ingredients are exhausted – whichever comes first. Bake for around 45 minutes or until the top is browned.
Do you have a favourite family recipe?
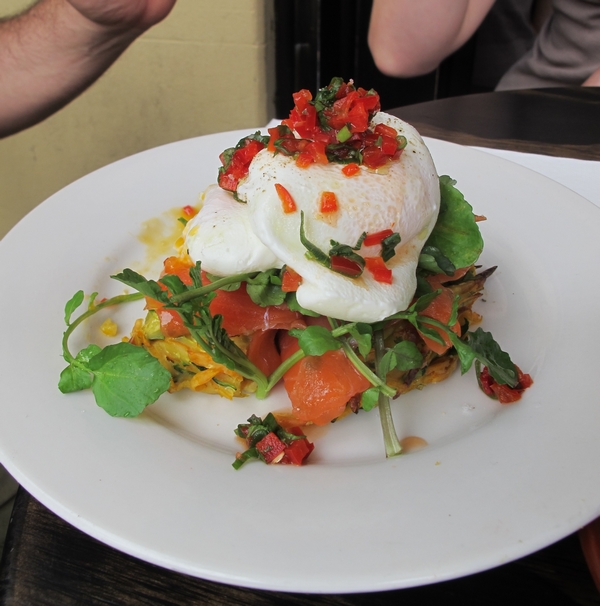
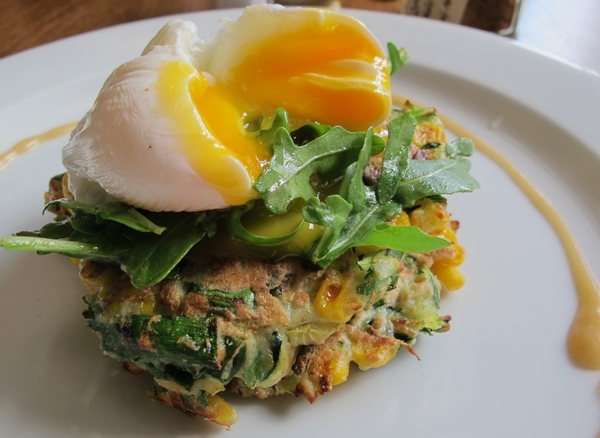
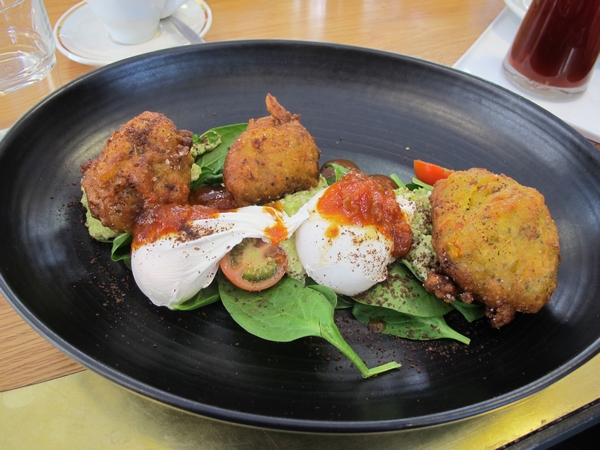
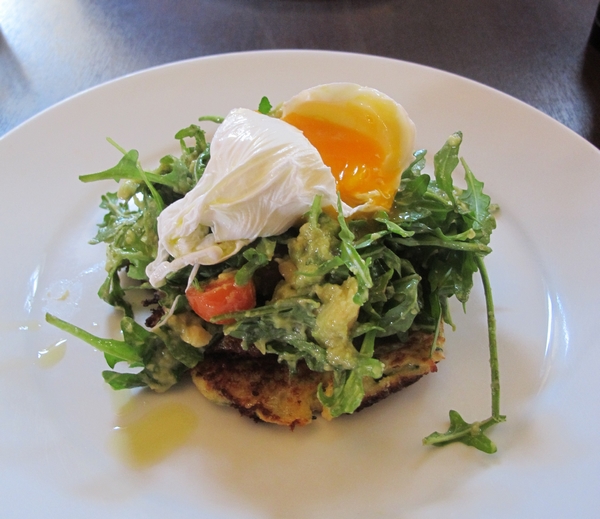
I don’t often go out for breakfast these days, but when I do, I’m a sucker for a fritter and a good poached egg. Recently, I started trying to replicate the flavour and texture of café-style inch-thick, fluffy fritters in my own kitchen, and the results have been pretty amazing. Here are the 4 ‘fritter truths’ I discovered on my journey to corn fritter heaven.
1. Corn fritters aren’t just pancakes with a tin of corn chucked in. Not to say a batch of pancakes or pikelets studded with super sweet, fiberless corn kernels ain’t a delight to the palate, but there’s just so much more they COULD be. So I’ve discarded the pikelet + tinned corn method I’ve used since adolescence (served with a liberal slosh of sweet chilli sauce on the side).
2. Good corn fritters are mostly corn, not batter; the main ingredient is given away in the title. The batter loosely bindes together the corn and other flavourful ingredients. It is light and fluffy and whipped-egg-white heavy (easy on the SR flour), and thus maleable. This means the fritters can be shallow or pan fried (even deep fried should the mood take you), in lumps or thick, flat saucer shapes.
3. Fresh corn is better! I’m told there are places in the world where the corn is so fresh and sweet you can gnaw is raw from the cob, but I don’t live in such a place so I find the corn needs to be sauteed a little pre-fritter. So saw those kernels off the cob, cook ‘em up, let ‘em cool and fold them into your feather-light batter, ready to dollop.
4. There are other things in there besides corn. This was a revelation to me, but of course it makes sense. Garlic. Zucchini. Onions. Chilli. Fresh herbs. Salt and pepper. Spices. Mushrooms. Bacon. There are so many amazing tidbits you can toss into your sauteeing corn. Hell, there are so many ingredients you can use in PLACE of corn, I just really like corn.
Lau’s Ultimate Corn Fritters
serves 4 as a side
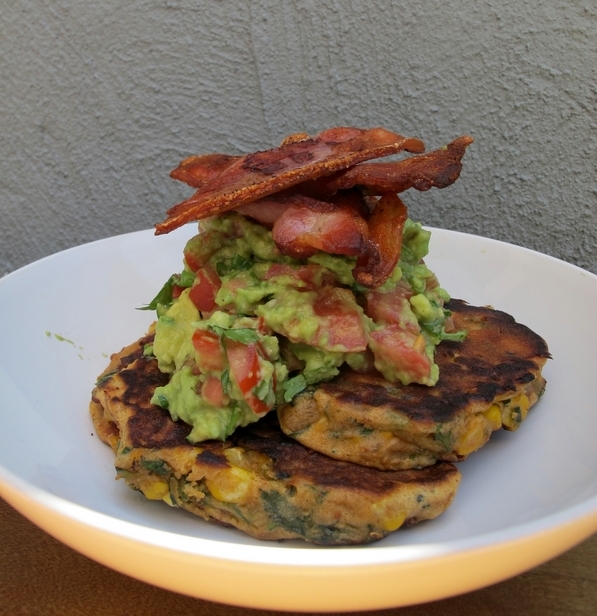
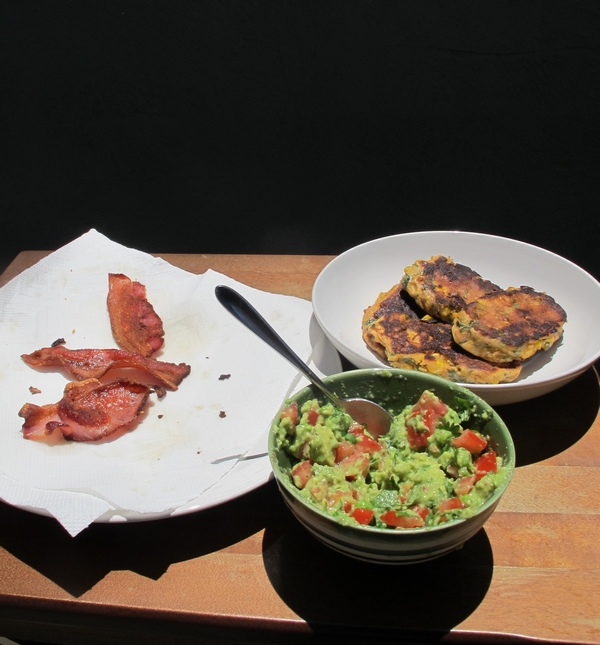
I’ve served these fritters many a way – with guac and crispy bacon, with tomato salsa and cumin yogurt, with asparagus and fried eggs. They are the perfect breakfast, brunch or breakfast for dinner.
For the guts of it
olive oil for pan frying (I prefer extra virgin)
1 single clove garlic bulb or 4 normal sized cloves
pinch salt
6-8 rashes bacon or similar, chopped
2 spring onions, chopped
1-2 Tbsp paprika
The kernels from 2 -3 small cobs of corn
½ bunch coriander, leaves finely chopped
For the batter itself
2 eggs, separated
¼ cup milk
½-¾ cup self-raising flour
To Serve
Crispy bacon
Guac
Heat the oil in a medium frying pan, sautee garlic with salt until soft. Add in bacon and cook until beginning to brown. Add spring onions, paprika and corn and cook until corn kernels are soft but still have some bite to them. Remove pan from heat and stir through coriander. Transfer to a large bowl to cool (perhaps in the fridge).
Beat the egg whites to stiff peaks.
Whisk milk and egg yolks together.
Once cooled, add enough flour to the corn mix so that everything is well coated. Fold through the yolk and milk mixture completely, then gently fold in the egg whites.
Dollop 8 dollops on a medium low grill or pan (oiled), flip when golden brown. Cook until cooked through.
Serve as you like. Suggestions include: crispy bacon, non-crispy bacon, guac, salsa, hot sauce, sour cream, poached eggs, fried eggs, hummus, greek yogurt, rocket, basil… the possibilities are endless.
What’s your go-to café breakfast?
So its full steam ahead with The Potluck Club as we’ve been compiling and proofing recipes, chasing up submissions and sorting through ph
otos. 24 bloggers have submitted a total of about 35 original recipes and as many photos. A huge thank you to everyone who has submitted their work to help raise money for Foodbank, in conjuction with The $35 Challenge.
This October, as part of the the City of Sydney Libraries’ ‘Lunches with bite’ series, I will be presenting a couple of talks on The $35 Challenge – one on Tuesday October 9th at the King’s Cross Library and one on Friday 12th of October at Custom’s House Library. The talks are on the week before the challenge, to get you ready-slash-psyched. Both talks are free but places are limited, so if you’re interested, follow the links to register.
I’ll also be hosting a recipe swap at the Glebe Library in November. We’re encouraging everyone to bring their favourite home recipes, cookbooks and food blog links – we’re calling it an ‘old-fashioned-meets-social-media recipe swap’. I’m both excited and phenomenally terrified, so come on down. If nothing else, it’ll be good for a laugh.
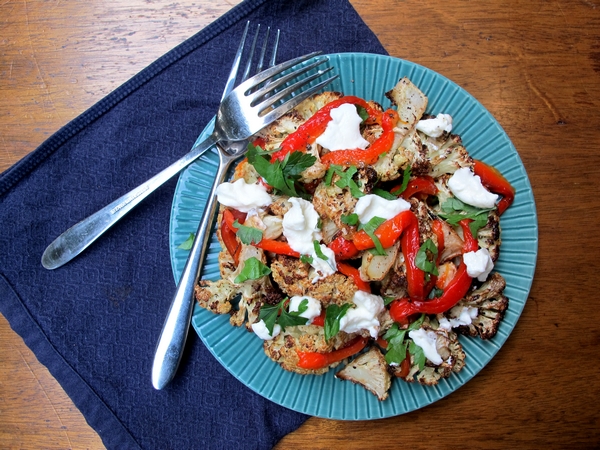
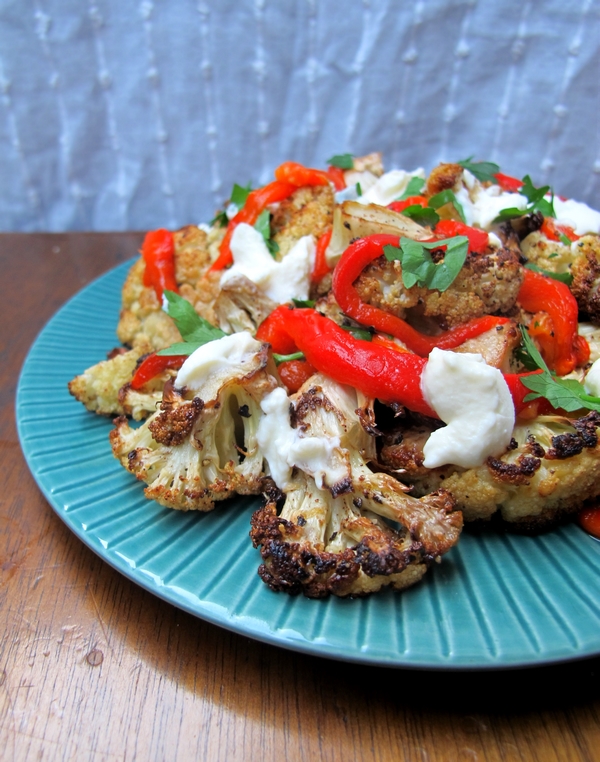
Since its been all about the e-cookbook lately, I thought it a good idea to post an actual recipe. I’ve been eating roasted cauliflower all winter as a side dish, but it also makes a fab ‘share plate’, as the kids say. Serve it with crusty bread and mediterranean dips, or maybe as a side to roast chicken or a comforting casserole.
Roasted Cauliflower Shareplate with Red Capsicum and Goat’s Cheese
- 1 large red capsicum (you will only need half of what you roast)
- 1 small head of cauliflower (about 900g), sliced into pieces of about 2cm thickness
- 2 cloves garlic, finely sliced
- the juice of half a lemon
- a very generous slosh of extra virgin olive oil, to coat the cauliflower
- 1 tsp baharat or, failing that, ground cumin
- freshly cracked salt and black pepper, to taste
- 50g goat’s cheese
- chopped continental parsley, to garnish
Preheat the oven to 200 degrees c. Roast the capsicum in a large baking dish, turning every 10 minutes or so, until soft and slightly blackened. Put to one side in a bowl and when no longer hot but still warm, cover with cling wrap to sweat.
Toss the remaining ingredients together (except cheese and parsley) in a large bowl to coat the cauliflower. Pour onto the tray used to bake the capsicum. Turn the oven down to 175 degrees c and bake for 30 minutes. Then turn over the cauliflower and bake a further 15-30 minutes until soft and slightly brown.
Meanwhile, skin the almost-cool capsicum, discarding the stem and seeds. Slice finely.
Arrange the cauliflower on a plate, draping the capsicum and dolloping the goat’s cheese as desired. Share with friends.
If food blogging means you can fly the length of this great brown land to spend the weekend eating and drinking yourself stupid with kindred foodie spirits you’ve met once, then I don’t see a downside.
I spent last weekend in Perth with two awesome food bloggers, hosts, tour guides and, dare I say it, friends Heather and Ai-Ling, who showed me all ‘the good Perth’ has to offer. We did cafes, small bars, markets, breakfast, the list goes on. They planned out every minute of my trip but somehow it was a laid back weekend. Seriously guys, get your foodie tours of Perth business going soon. You’d make an absolute mint.
At the Subiaco farmers’ markets, I picked up a swag of corn cobs and limes. I had no plans for them, other than perhaps to grill them on the BBQ. After a night stumbling through small bars and drinking out a of jam jars we found ourselves in a bookshop and I found myself thumbing through Lonely Planet’s ‘The World’s Best Street Food’, where a recipe for elote (corn cobs) caught my eye.
This Mexican/US recipe is the kind gracing the menus of many an up-to-the-minute dive bar or slider-serving eatery in urban Australia these days. Now you can start your own Americana/Mexicana shack right in your own living room with the surprising flavour combo of corn, lime, mayo and cheese. Elote goes great with any virtually flavourless cerveza such as Mexico’s Corona or Korea’s Hite (but for God’s sake, not Quilmes, NEVER EVER drink that), just stuff a lime wedge down the bottle’s gullet for a bit of zing. We ate these on the beach in Perth at the end of a long hot day, watching the gorgeous sunset over the sea.
Elote asado
Grilled corn cobs
(Adapted from Lonely Planet’s The World’s Best Street Food)
Makes 12 mini cobs
You will need:
4 large corn cobs, husks on (each whole cob should make 3-4 mini cobs)
4 juicy limes, cut into quarters – ¼ of a juicy lime per ‘mini cob’
About 8 teaspoons of mayo – about ½ teaspoon per cob find out how many cups this is!
100g freshly grated parmesan or romano cheese – I used pecorino
Heat up your grill or BBQ until it is quite hot. Place the cobs, in their husks, on the grill, turning every few minutes or so. They will take a long time to cook, probably 30 or 40 minutes depending on the heat of your grill, but trust me, it is well worth the wait to have those gorgeous charred morsels popping in your mouth. You will know when they are ready when the husks are blackened and burnt to a crisp.
The cobs will be quite hot so you will may need to wear oven gloves to remove their husks. You could also wait a while and let them cool slightly, but the joy of eating the corn hot is kind of the point and anyway, after waiting so long for them to be ready, you’re probably starving. De-husk them ASAP and cut them into thirds or quarters.
The rest is simple – rub each mini cob well with a lime wedge, smear on some mayo and then roll it in grated cheese. Serve immediately and with beer.
As this is a street food there are many variations. Most commonly lime, sour cream and chilli powder are used. You can also use salt instead of cheese. Go nuts!
Sometimes a missing ingredient can lead to a tasty surprise. This is one such example, where I planned to make tabouleh for a bbq I was attending, but found that, strangely enough, Vietnamese greengrocers don’t always stock parsley. As the mint and spring onions smelled amazing and I’d already ducked into Woolies and found cracked wheat , the closest I could get to burghul (which is finely cracked wheat), I decided to forge ahead- almost-tabouleh it would have to be. Luckily there was plenty of dill around, so I improvised.
The recipe turned out well, very fresh-tasting and with a nice zing. The lemons I had were ancient (explains the $1/kilo price tag) so I had to add a teaspoon or so of castor sugar, but if your lemons are reasonably fresh you should be ok. This recipe makes a massive salad, a great addition to any summer feast.
Almost Tabouleh
1 cup cracked wheat or burghul
1-2 cups boiling water
1 clove garlic
6 spring onions
1 small bunch mint
1 bunch dill
3 large, ripe tomatoes
2 lebanese cucumbers
2 large juicy lemons
1-2 Tablespoons canola oil
1 -2 teaspoons baharat spice mix (if you have it)
Freshly cracked pepper and salt, to taste
Sugar (perhaps)
If you’re using cracked wheat, boil in 2 cups of water for 10-15 minutes and leave to cool. If you’re using burghul, soak in 1 cup boiling water, covered for 10 minutes. You may need to drain it a bit, I had to rinse the cracked wheat in cold water as it went quite starchy.
They key to this salad is fresh herbs, finely chopped. Very finely chop the garlic and mix through the burghul/wheat. Finely chop the spring onions. Pick the mint leaves, discarding the stalks and very finely slicing the leaves. Finely chop the dill until you reach the point where there’s more stalk than leaf. Stir the herbs through the wheat.
Roughly chop the tomatoes, then quarter and slice the cucumbers. Douse in lemon juice and a slosh of oil, adding everything else to taste. Stir well and refrigerate. Best made a few hours ahead, can make the day before.
Have you ever had a missing ingredient lead to an unexpected dish?
I’m not much for fancy dinners, perhaps because I’m a woman of the people, or, more likely, because I can’t afford to eat them. Contrary to what some may have you believe, I’m not invited to eat for free in trendy restaurants on a regular basis. Or at all. Ever. Once, I was invited to review a burger joint I already frequented. And I paid. That’s the sum total of my invitations to restaurants. When other food bloggers say if they didn’t eat on the house, they’d never get to blog a high class place, I have literally no idea what they’re talking about. Oh, for the luxury of agonising over the ethics of disclosure.
So when I heard that this year’s Eat. Drink. Blog. food blogger’s conference included a fancy dinner at a place I’d heard of, I was in. I’m not ashamed to say this was the fanciest dinner I’d ever had. I’m also not ashamed to admit I almost walked past the restaurant the first time around.
I arrived at 7:55pm as dinner was to start at 8, and was informed I’d missed the appetisers. No idea what they were but I’m sure they were delicious. I plonked myself down next to my lovely co-bloggers and we were given a rundown of the menu, which was impossible to hear over the general merriment that inevitably accompanies a $134.90 wagyu rib on the bone or a crustacean so large, it requires not so much a bib as a full length plastic apron.
A glass of Reisling soon calmed my nerves and a spotlessly attired waiter informed us the entrees would be out soon. Servers laden with plates soon appeared and carefully placed our plates. What greeted us was not so much a meal as a landscape. Smoked yellow fin tuna carpaccio, swirled around some mayonnaise or equivalent, studded with micro herbs, pickled chillis and a smattering of pistachios. Cameras came out in a flash (pun completely intended) and a waitress appeared out of nowhere to inform us that a special, professionally lit table had been set up in the corner should we want to photograph each dish in a more flattering light.
Many of my co-bloggers kept on snapping away, even requesting used wine bottles to set up an enticing tablescape. I, however took my first bite of carpaccio and it was amazing – silky, smooth, not in any way fishy, and with a texture my mouth couldn’t quite make sense of. The mayo-like-substance it sat on was slightly sharp and very creamy, and the pickled chillis, the most remarked upon feature of the dish, exploded in indescribable bursts of vinegary sweetness. As I finished the dish, all the flavours started to meld together and I became conscious only of the dishes textural contrasts. I loved it.
The second course of slow roasted beef tenderloin and wagyu flat iron steak was sliced up on platters to share. We also had kipfler potatos with chorizo and spinch (unexciting), grilled asparagus (tasty) heirloom tomato salad with basil and roast olives (to die for) and a cast of condiments. This was washed down with a nice glass of shiraz. I have to talk about the flat iron steak here. Sure, I slathered it with chimichurri but I needn’t have done, it was amazing. It had a lovely charred crust on the outside, was tender and juicy on the inside. One of the best steaks I’ve had outside of Argentina, although that gives you no indication of quality whatsoever so I’ll say this instead; it was quite good.
The final course was a cheese course of sweet gorgonzola, which was a welcome end to a day spent stuffing ourselves with pastries, chocolate and macarons. The mild blue cheese was sprinkled with toasted hazelnuts and drizzled with iron bark honey. This was perfectly offset with a glass of St Hallett Rose from the Barossa Valley.
I got into the habit of getting up each time a new plate we placed in front of me, ducking over to the ‘display table’ and snapping away. This seemed an efficient use of time as I was unable to begin eating until my dining companions had finished their photography. Every time I returned, my napkin was neatly folded by my plate and my water glass refilled. I can’t fault the service, I can’t fault the food, I can’t fault the price (free). All in all, a great night.
What about you? Are you much of a fancy dinner person?
Day 5 of The $35 Challenge sees me a tad tired of coming home from work and having no choice but to make dinner (and tomorrow’s lunch) from scratch. Don’t get me wrong, I cook dinner at least 5 days a week but sometimes that could be just grilling a steak or making a salad. I haven’t chopped this many veggies on a regular basis since I was vegetarian.
I’ve been saving a treat for later in the week, knowing that we were going to get sick of veg-heavy meals. Maybe it wasn’t a great idea as piza is a bit labour intensive, but I sucked it up and got on with it. This meal is the ultimate in frugality- it takes one portion of pizza dough (care of The Australian Women’s Weekly) and divides it into three so-thin-you-can-cut-them-with-scissors pizzas.
Fancy Pants Pizza
(makes 3 pizzas, serves 4)
2 teaspoons (7g) dry yeast
1 teaspoon sugar
¾ cup (180ml) warm water
2 cups (300g) plain flour
1 teaspoon salt
2 tablespoons olive oil
Combine yeast, sugar and water in a small bowl. Cover, stand in a warm place for about 10 minutes or until very frothy. I usually have to put it in my oven on its lowest setting.
Put flour and salt into a large bowl; stir in all other ingredients with your hands. Mix to a soft, sticky dough.
Knead dough for 10 minutes/until smooth and elastic. Oil the bowl you mixed the dough in and place the dough in. Cover with cling wrap, stand in a warm place for about 1 hour or until doubled in size.
Preheat the oven to 250◦c/220◦c fan forced (I have a pizza stone in mine). Punch down the dough, knead until smooth and then separate into three even balls. Let sit for 10-15 minutes.
Roll out one of the balls, place on greeaseproof paper and top as desired. Don’t go nuts on the toppings or you’ll weigh your pizza down. Place the pizza, on the paper either on the bottom of your oven, the baking rack in the oven or on a pizza stone if you have one.
Tip: Each pizza should take less than 15 minutes to cook. Keep an eye on it or it will burn! Be sure to leave about 10 minutes between pizzas to reheat the oven properly.
What’s you fave homemade treat?
I chose this image as I doubt I’ll ever see so much fruit in our apartment ever again.
Yesterday, we grabbed the few grocery store items we needed at woolies. This was relatively stress-free as the number of things we needed was dictated by our budget – $35 x 2. At woolies we spent about $18 and this got us cottage cheese, 2 litres of milk, tinned tomatoes, 59 cent spaghetti, frozen spinach and not much else. It took all of 10 minutes and at this made me wonder if maybe extreme cost cutting is the way to go.
However, this morning at Paddy’s Market (Haymarket) was more of a trial. We only had one shopping bag with us and I had decided we needed to buy heaps of fruit because we never eat fruit so now is obviously the time to start. We spent about half our budget there and walked out with more fruit and veg than we could carry. I wondered how we’d feed ourselves on such a budget if we didn’t have a really cheap market nearby.
I knew this would be a hard day, mostly because both Senhor R and I are exhausted. Also because I hate going to Paddy’s Market’s to buy fruit and veg almost as much as I hate exercise.
When we got home, we realized there was just over $16 left in our budget and we were out of coffee. The coffee we buy that costs $13. And we still hadn’t bought any meat. At this point we were at each other’s throats but we finally bought steak for $5 and downgraded to the $12 coffee. Yep, that’s right the challenge is already technically broken – I have spent $35.50.
After Senhor R had his coffee and things calmed down, I decided it was time for a massive serve of some of the fruit and veg we’d just bought in the form of a salad. This is a great summer salad, everything is really finely chopped and you get all these different textures – from mushy mango to crunchy macadamia and everything in between. I served it with a massive black sesame rice cracker we had in the pantry, but it’s fine just as it is. You don’t have to stick to what I used – you can sub in or add ingredients like red onion, cucumber, pineapple, lime juice, red basil, spring onions, grilled chicken, nectarines, tuna, cannellini beans, cashews, peanuts…the list is endless.
Everything Summer Salad
Serves 2 very hungry people
1 ripe tomato, chopped
½ bunch mint, finely shredded
½ cup chopped macadamias
1 mango, chopped
½ a large carrot, grated
A handful of lettuce, chopped
¼ of a red or yellow capsicum, finely sliced
½ packet tofu puffs, cut in half
For the dressing
1 long thai chilli, deseeded and finely chopped
¼ cup fish sauce
The juice of 1 lemon
2 tsp brown sugar
2 Tblsp water
Put all the salad ingredients into a large bowl. Stir the dressing ingredients together. Pour over about half the dressing and stir the salad well. Serve immediately.
It’s not too late to support The $35 Challenge. During Anti-Poverty Week, from October 16-22, participantshave $5 a day to spend on food. By experiencing poverty for just 7 days, we come to a better understanding of the realities and stresses of those living in poverty. By blogging or tweeting this experience, we can raise awareness of an issue so often swept under the rug. And by donating the remainder of the money we would usually spend on food to OzHarvest, we can make a real difference.
What grocery item can you just not live without?
About me
 Sharing easy recipes, hunting down the best coffee. Honest accounts, nothing too serious. Read more...
Recent Posts
- Aerpress means no more shit #travelcoffee and #workcoffee
- Why I write and four ace bloggers who do it better
- The five best things I ate in London
- Shoreditch is awesome, airports are not
- I quit sugar? Do I bollocks.
- Cubao Street Food, Alexandria
- The Reformatory Caffeine Lab, Surry Hills
- Brewtown Newtown
- Stay caffeinated over Christmas
- Gumption by Coffee Alchemy, Sydney CBD
Popular posts this month…
 Amaretti – The no-fuss treat posted on November 18, 2010
  5 tips for perfect espresso posted on November 23, 2010
  Boysenberry Banana Sorbet posted on November 26, 2010
  Rich Portuguese Custard posted on November 29, 2010
  Desert Island Potatos posted on December 3, 2010
  Sri Lankan Spinach with Coconut posted on December 10, 2010
  Mousse Chocolate and other peoples’ families posted on December 15, 2010
  The quest for Mex part 1 – Mexican Red Rice posted on December 17, 2010
Disclaimer:
All opinions in this blog are mine, an everyday, real-life person. I do not accept payment for reviews and nor do I write sponsored posts. I do not endorse the content of the comments herein.


